Tuesday, 5 June 2012

Vegetarian Sloppy Joes


Apologies if you've ever eaten bona fide sloppy Joes...I haven't, so this recipe is a bit of a stab in the dark! I've seen them eaten on various American TV shows, so after a bit of online research I've come up with a vegetarian/vegan version.

This is an economical and low-fat recipe, which you could cook in a slow cooker or even whilst camping.

Serves 4-6

  • 1 large onion, finely diced
  • 1 large bell pepper, finely diced
  • 2 cups veggie/vegan mince e.g. Quorn or vegan alternative (vegetarian ground beef-style crumbles)
  • 1 large clove of garlic, crushed
  • Finely chopped pickled or fresh jalapeños/chilli sauce/cayenne to taste (optional)
  • 1 portion home made bbq sauce, or ½ cup shop-bought mild/sweet bbq sauce.
  • 4 tbsp tomato purée
  • 1 cup boiling water or hot vegetable stock
  • Bread rolls/burger buns/pitta breads to serve
Heat 1 tbsp olive oil in a large pan.
Add the onion, garlic, chilli and pepper and cook gently for 3-5 minutes until softened.
Turn up the heat slightly, stir in the tomato purée and cook for a further minute or so.
Add the veggie mince and mix well.
Pour in the bbq sauce and water/stock.
Bring to a simmer, cover the pan and cook for around 15 minutes, stirring occasionally. 
Remove the lid and allow to cook until the sauce has thickened up and most of the water/stock has evaporated.
Serve in warmed bread rolls with oven-baked sweet potato chips (fries) and corn on the cob.

Not suitable for freezing.


Alternatives:
Halve the amount of veggie mince and add an extra 1-2 cupfuls of finely diced seasonal vegetables, such as courgette/zucchini, squash, mushrooms, sweetcorn or peppers (and/or some cooked lentils).
Pin It

Wednesday, 30 May 2012

Re-design under way...

I tried to access my blog earlier today and got a warning message, saying 
Warning: Something's Not Right Here!
wedonteatanythingwithaface.blogspot.co.uk contains content from www.shabbyblogs.com, a site known to distribute malware. Your computer might catch a virus if you visit this site....We have already notified www.shabbyblogs.com that we found malware on the site. For more about the problems found on www.shabbyblogs.com, visit the Google Safe Browsing diagnostic page.
Scary eh? I think I've found the offending Shabby Blogs script and removed it, so everything seems safe again, but obviously my blog doesn't look quite the same as it did! I've challenged Miss Ony and Miss Kahonie to design me a new background and header, which may take a while and might take a few trial runs to see how it looks, so please bear with me until my re-design is complete.

Thanks!
Pin It

Vanilla Giant Cupcake

© A cake fit for the Queen (well almost!)
We recently had a Jubilee celebration at work and my contribution was a giant cupcake.. they loved it! This recipe was adapted from my giant chocolate cupcake recipe using the Wilton/Lakeland giant cupcake tin. As I made a Jubilee cake, I decided to colour a third of the mixture blue and a third red (although it turned out pink!) using a little food colouring. 

Serves 20

  • 250g/10oz butter/dairy-free spread
  • 250g/10oz sugar
  • 5 medium eggs
  • 250g/12oz SR flour
  • 5 tbsp milk/water
  • 1 level tsp baking powder
©
Pre heat the oven to 160C/150C Fan/Gas 3.Grease the cupcake tin and sprinkle with a little sieved flour.
Cream the butter and sugar and beat in 3 of the eggs.
Add the flour, baking powder, milk, and remaining eggs and mix until just combined.
Spoon half of the mixture into each side of the cupcake pan.

Bake for 50-60 minutes, or until the cake has risen and is firm to the touch (in the centre).  If the cake is browning too quickly, turn the oven down by 10C.
Once cooked, leave to cool in the pan for 5 minutes and then turn out onto a wire rack to cool fully. Trim a little of the top of the cakes with a sharp knife (once cold) if needed.
©
To cover the base in fondant icing
Roll out some fondant icing on a board sprinkled with icing sugar, into an approximately 25cm/10" circle - I use a non-stick pastry mat.
Spread a little of the butter cream (recipe below) onto the base and sides of the cupcake bottom...it doesn't need to look neat!
Place the cupcake base into the centre of the fondant and gently ease the fondant up around the sides and over the top of the cake (there should be enough icing to overlap the top slightly.) Press into each groove of the base with your fingers or the back of a teaspoon.
Top the base with a good dollop of butter cream (and some jam if you want to) before placing the top section on.

Icing the top of the cake

I've found that the butter cream doesn't stick to the cake very well if you pipe it straight on, so I crumb-coat it first (roughly spread a little butter icing all over the top section using a palette knife), and chill the cake for about half an hour, before piping the remaining icing on.
Pipe around the join between the two cakes.
Once iced, decorate with sprinkles etc. while the icing is still soft.

Vanilla Butter Cream/Frosting
  • 150g/6oz softened butter/dairy-free spread
  • 350g/14oz icing sugar
  • 2 tsp vanilla extract
  • 1-2 tbsp boiling water, if needed
Cream the butter and icing sugar.
Add the vanilla and just enough boiling water, if needed, to make a soft, spreadable butter cream.

Alternatives: 
The 5 egg mixture I use doesn't quite fill the tin. You can make an even bigger cake in the same tin, by upping the ingredients to 300g/12oz butter/sugar, 350g/14oz flour and 6 eggs. Keep the amount of the remaining ingredients the same.

If fondant icing the base sounds too tricky (I'll admit it did take me two attempts), then just tie a ribbon around, or make a paper cupcake holder to cover the base.

You could also spread the butter icing onto the top of the cake if you aren't confident at piping.

Pin It

Monday, 28 May 2012

Barbecue Sauce (Vegan)

©
This is my tried and tested bbq sauce recipe, which is great for basting and serving with barbecued veggie burgers, kebabs and sausages.
  • 5 tbsp tomato ketchup
  • 2 tbsp white wine/cider vinegar
  • 2 tbsp vegan Worcester Sauce (I use Life Worcester Sauce)
  • 1 tsp soft brown sugar (optional)
  • ½ tsp dried English mustard powder (or use a pinch of cayenne)
  • ½ tsp smoked paprika
  • ½ tsp dried oregano
Mix the dry ingredients with the vinegar and Worcester sauce. 
Add the ketchup and stir well.
Store in an airtight container and refrigerate until needed (keeps for 1 week).

Alternatives:
Add different herbs and spices if preferred.

Find more
bbq recipes here. Pin It

Friday, 25 May 2012

Bearded Theory Festival 2012 - a review

© Essential festival items!
We went to the Bearded Theory festival last year and to be honest, despite the line up, we weren't that impressed with the lack of space in the camping area and the (un)helpfulness of the stewards. This year, we hesitated before booking...partly due to our previous experience and partly due to the cost...and before we reached a firm decision, it was sold out! Amazingly, we were lucky enough to win tickets thanks to a competition I spotted on Festival Kidz, and before we knew it we were packed up and ready to go, hoping we'd be able to find a space to pitch without too many problems.

Thankfully, the organisation was much better this year, although it did feel slightly odd to cart all of our gear across the main arena to get to the camp-site! We trudged right down to the bottom of the camping area and easily found a flat space to pitch in the quiet family area...this was a big improvement on last year's cramped pitch of mole hills, nettles and thistles! Unfortunately it started raining as we arrived, so we had to pitch quickly before our stuff got wet....but such are the joys of camping in the UK.

© Family camping area
Although the weather was pretty cold and dismal for the whole weekend, the mornings were dry enough for me to get out the camp stove and make a cup of tea and a cooked breakfast for us all.

Portaloos and water taps were spaced out well throughout the camping areas and arena and were kept fairly clean (that's if you're used to festival toilets!). There were showers available too (for a fee), but we didn't use them due to the queues.


There was a good range of different genres of music during the festival, from folk and acoustic to dance and rock - so something to suit all the family. The Angel Gardens kids area looked better than last year too, and offered music workshops, craft activities, theatre and puppet shows plus a baby-care area and even two dedicated kids-only toilets! At 11 and 13 years old, my kids felt they were too grown up to go in though.
© Angel Gardens kids area

There was a decent variety of food outlets, including many which provided vegetarian and vegan options. The onsite shop sold essential groceries such as bread, milk and snacks too. Bar prices were reasonable, although most people (us included) chose to bring our own alcoholic drinks, which we were allowed to bring into the main arena area.

We saw some great bands over the weekend including headliners Adam Ant (replacing the Levellers, who were absent due a fiddle-related injury!) and The Damned. Other notable acts that we particularly enjoyed were Ferocious Dog, Terrorvision, Chumbawamba and Mark Chadwick (from the sadly missing Levellers!). We heard Wheatus (of Teenage Dirtbag fame) from outside the Tornado Town big top, as we didn't get there early enough to get a decent spot after decamping and lugging everything back to the car. My only criticism of the festival this year is that Wheatus and Mark Chadwick should have been on the main stage, as both drew large crowds which spilt out of the tent.

© Mud!

We had to leave before Dreadzone - the Sunday night headliners, but of course before we left, we had to take part in the hilarious fake beard record breaking attempt, donning our Poundland stick-on beards and moustaches and looking pretty suave. A beard-wearing baby scooped the prize for best beard and won tickets to next year's festival...aawww!

Bearded Theory Festival takes place at Kedleston Hall, Derbyshire. For more information, visit
Bearded Theory.

More posts on 
family festivals, camping recipes, kids' camping food ideas.  Pin It

Tuesday, 22 May 2012

A trio of salads for Britain's Got Salad

©
Here's my own contribution to Britain's Got Salad...a trio of salads, which all just happen to be vegan: 

Mushroom and Coriander Salad

  • 250g/10oz chestnut or mixed mushrooms, wiped and sliced
  • 1 small onion, diced or sliced
  • 1 clove of garlic, crushed
  • 1 tsp ground coriander
  • 1 tbsp fresh coriander/cilantro leaves
  • 1 tbsp olive oil
  • 1 tbsp balsamic vinegar
Heat the oil up in a pan and add the mushrooms and onion.
Cook until soft and then the ground coriander. Cook for a further minute, then add the garlic and balsamic vinegar.
Heat until most of the juices have evaporated and then remove from the heat. 
Finally add the fresh coriander and stir through.
Serve warm or cold.

Spicy Store-cupboard S
alad
  • 100g/4oz tinned sweetcorn, drained (use fresh when in season)
  • 100g/4oz roasted sweet red peppers from a jar, diced (or cook your own)
  • ½ red onion, diced finely
  • 1-2 tsp chopped fresh parsley
  • Finely chopped pickled jalapeño chilli to taste (optional)
  • 1 tbsp olive oil 
  • 1 tbsp lime juice
Mix all ingredients together and serve!

Lemony Potato and Pepper Salad
  • 2 large potatoes, diced into 2-3 cm/1" chunks
  • 1 large/2 small sweet potatoes, diced into 2-3 cm/1" chunks
  • 2 yellow or orange bell peppers, diced into 2-3 cm/1" chunks
  • 3 tbsp olive oil
  • Juice and zest of 1 lemon
  • 2 tsp fresh chopped rosemary
  • Black pepper to taste
Heat the oil in a roasting dish at 200C/Fan 190C/Gas 6.
Par boil the potatoes (not the sweet potatoes) for 5 minutes. Drain.
Add both types of potato to the roasting dish and turn to coat with the oil. Roast for 20-30 minutes, until starting to brown.
Add the diced pepper, lemon zest, black pepper and rosemary to the same dish and turn the potatoes.
Bake for a further 15-20 minutes or until all of the vegetables are cooked and slightly crispy.
Remove from the oven.
Pour the lemon juice over while the dish is still warm and mix gently to coat.
Serve warm or cold.
Pin It

Monday, 14 May 2012

Britain's Got Salad!

©
I came up with this idea when I was ill and in a slightly delirious state a few weeks ago. I was in lying in bed, dosed up with painkillers and decongestants, listening to the TV with my eyes closed, when a trailer came on for Britain's Got Talent. As my ears were blocked, I misheard it as Britain's Got Salad and I thought that would be a great title for a salad talent show!!
blog linky
Now, one of my favourite veggie bloggers (Jacqueline at 
Tinned Tomatoes) runs a monthly soup and salad challenge, so I don't want to step on her toes. This is therefore a one off event (or maybe an annual one) to celebrate and publicise National Vegetarian Week.

Since starting my blog and reading many others, I've come to realise that there are some fantastic salad ideas about that include an 
amazingly wide variety ingredients, so I'd like to encourage as many people as possible to get excited about salads!

Unfortunately after ordering a salad in most British pubs and restaurants, you'll be presented with nothing more than a bowl of shredded iceberg lettuce, sliced cucumber, some bullet-hard tomatoes and maybe a few raw onion rings if you're lucky...no dressing, no herbs, no taste! 
Obviously we have to import many salad ingredients throughout the winter months, but we have fantastic salad ingredients coming into season right NOW.

To enter, just link up your favourite salad recipes (that includes raw and cooked salads, plus dips) 
or any other salad-related posts (review, news, growing tips etc.). The only proviso is that your post must be related to salad in some way, and any recipes must be vegetarian/vegan or show how they can be adapted for vegetarians. It would be great if you would add my BGS logo to your post too, but it's not compulsory. If you want to add the list of entries to your own blog post, get the InLinkz code here.  If you're not a blogger, feel free to leave your recipes and tips in a comment instead.

So here it is...ladies and gentlemen...BRITAIN'S GOT SALAD; Unfortunately Simon Cowell et al won't be judging your entries and there's no cash prize I'm afraid!

Logo made with
Cool Text: Logo and Graphics Generator
Pin It

Friday, 11 May 2012

Have you got time to share with Deki?

Tots 100 have recently launched Time to Share, which aims to raise awareness of smaller charities, publicise volunteering opportunities and of course raise funds, by getting bloggers involved.

I've been paired up with Deki, which is the first UK person-to-person microloans charity; Instead of giving 'aid' they give loans to people from Togo, Malawi, Ghana and Nepal so that they can set up or expand their own businesses and access training and support - this allows people to preserve their 
dignity, as they are not receiving a hand-out, but a fair loan that needs to be repaid.

How does it work?
Anyone can lend from as little as £10. You can even raise funds as a group (e.g. a work place or school). It's is a very engaging way of giving because you can pick the person you want to support. Also your money goes to that specific person and not to an obscure charity pot.


Before they receive a loan, each applicant goes through a process of basic training and the testing of their business idea - it's in everyone's interest that their idea is solid. 
All being well, you'll get the money back, when the loan is repaid (although there's no guarantee of this) and you can then reinvest the money to help someone else. 

Watch this animation to find out more:


This You Tube clip shows some of Deki's success stories.

What sort of people need a loan?

Deki's website features many people who have started their own businesses and want to expand them. These include stall holders, food vendors, dress makers and many more besides. People just like you and I, who want to be financially self-sufficient and to provide the best future they can for their families.

It's been a difficult decision to make, but I've chosen one particular person to lend to, and I'm asking you to consider lending to the same person, to try and make a difference together. I've decided to support someone who despite living in very different circumstances to me, has a lot in common with me.

Leontine Ameyo KoutremoLeontine lives in Lome, Togo. She's the same age as me and like me, is married with two children. She sounds like a bit of a foodie,  as she used to be a fruit retailer but now has a little stall selling rice, yams and cooked food. She's asking for a loan of £390 so that she can buy stocks of oil, beans, rice and yams to grow her business. Leontine wants to provide her children with a good education and maybe one day have her own home.

If you have the
Time to Share, please join me in raising money for Leontine's loan, by sharing this post and visiting her page on Deki's website.

Thankyou.
Pin It

Monday, 7 May 2012

How to make your own vegetarian chorizo

© 
I have an admission to make...I've never eaten real chorizo sausages, so my humble attempt at a recipe for vegetarian version of chorizo may be way off. However, it's worth having a go at making them, as they taste good whether they're realistic or not! I've looked at loads of  meaty recipes and I've come up with a combination based on those flavours added to my basic shami kebab recipe.

Makes 8 sausages

  • 1 ½ cups vegetarian mince (vegetarian ground-beef style crumbles), defrosted if frozen
  • 1 ½ cups fresh wholemeal breadcrumbs
  • 1 large onion, finely chopped or grated
  • 1 small or medium egg
  • 2 large cloves of garlic, crushed
  • 2 heaped tsp smoked paprika
  • 1 tbsp sweet/mild paprika 
  • 1 tsp chilli paste/1 fresh red chilli deseeded and finely chopped
  • ½ tsp ground fennel seeds
  • 1 tsp dried oregano
  • Black pepper to season
  • 1 tbsp tomato purée 
  • 2 tbsp wine/cider vinegar
Heat 2 tbsp of olive oil in a pan.
Add the onion and cook on a medium heat until soft, but not brown.
Add the garlic, herbs and spices and cook for a further minute
Stir in the tomato purée and vinegar and heat through.
Remove from the heat.
Place the veggie mince and breadcrumbs in a bowl and mix to combine, breaking up any lumps of veggie mince. 
Add the onion and spice mixture and stir together (or blend in a food processor for a smoother texture -  I did this the second time I made them, and found that they stuck together a little better).
Finally add the egg and mix/blend until combined to make a firm but moist mixture, adding more breadcrumbs if needed.
Place in the fridge and allow to firm up for 30 minutes.
Shape into 8 sausages or 16 meatballs, and fry on a low-medium heat for 10 minutes, turning once or twice. Alternatively, brush with oil and bake in the oven at 200C/180C Fan/Gas 6 for around 15 minutes, or grill/broil/bbq.

Eat hot or cold.

Suitable for freezing.

Alternatives:
For a vegan version, replace the egg with a suitable binder.
For a Mexican-style vegetarian chorizo sausage, swap the ground fennel and smoked paprika for ¼ tsp ground cinnamon and 1-2 tsp ground cumin. 

Find loads more veggie recipes celebrating National Vegetarian week, over at Tinned Tomatoes.
Pin It

Monday, 30 April 2012

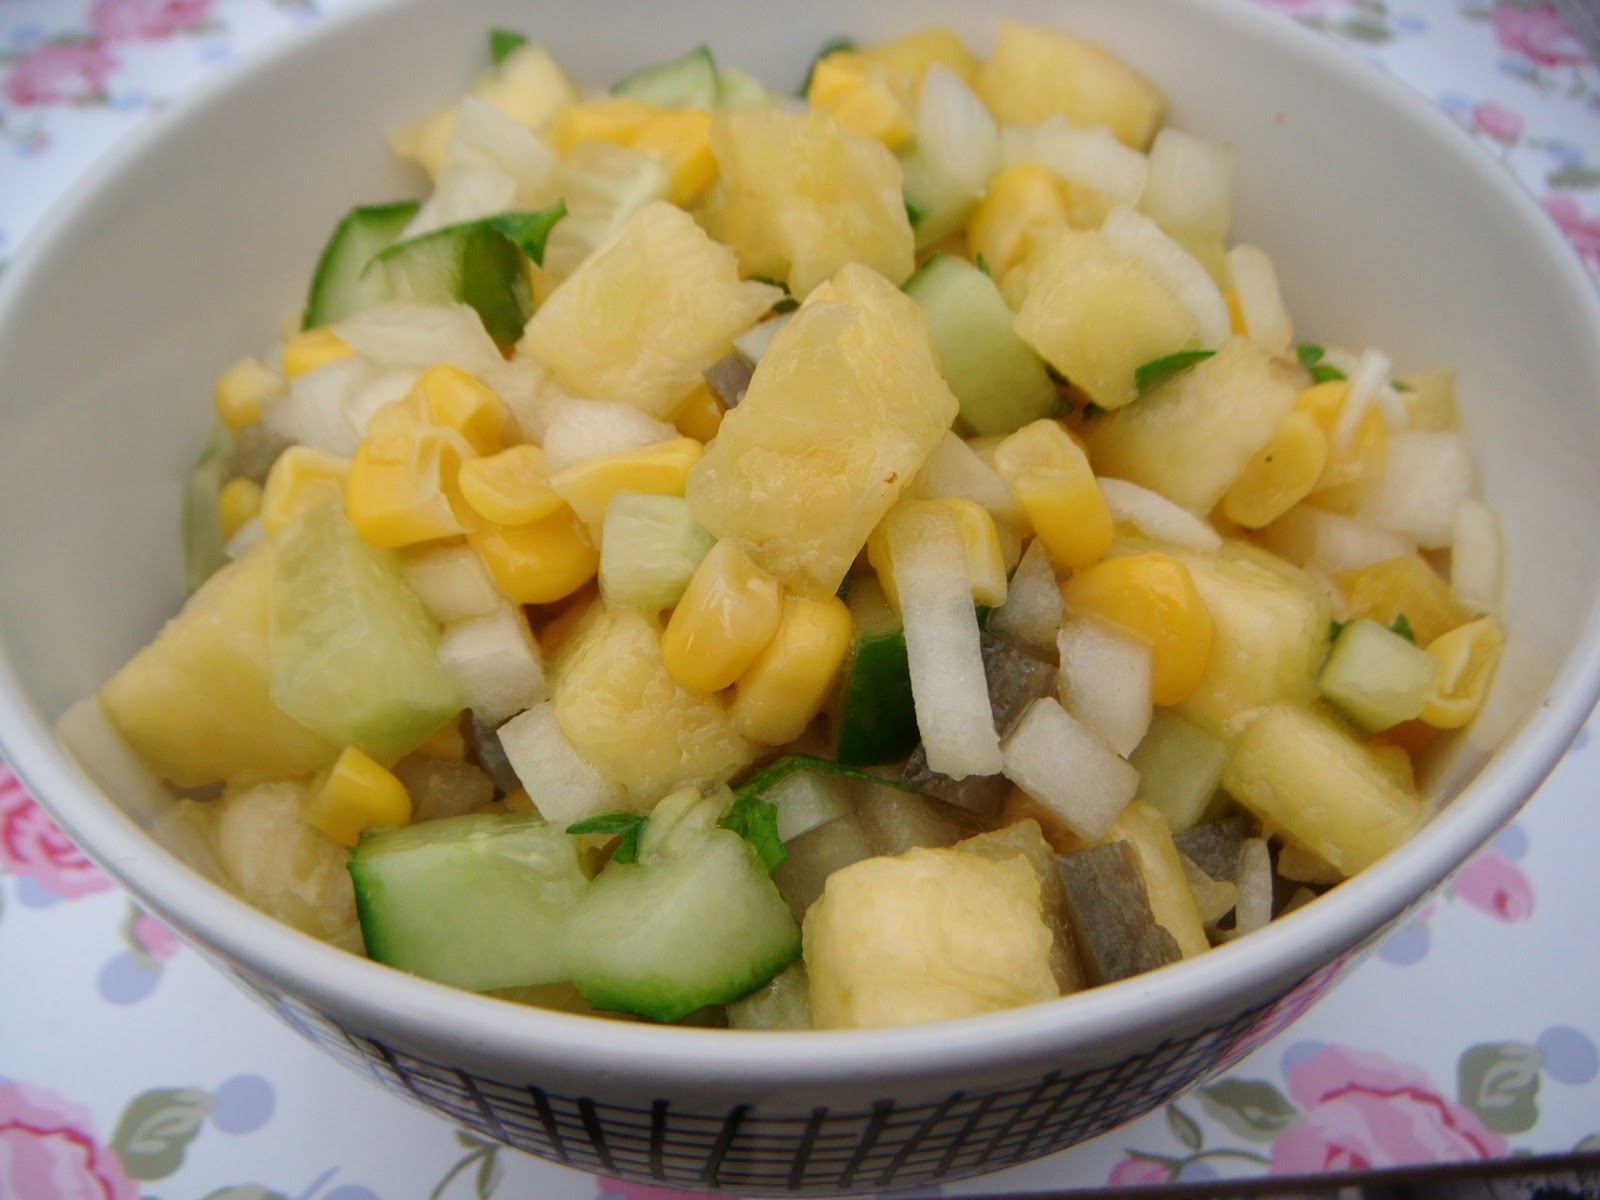
Pineapple, Cucumber and Sweetcorn Salsa

I'm not a big fan of the fresh tomatoes we get in the UK...even the vine ripened ones taste too tomatoey for my liking! I will eat those big, sweet juicy (and ugly) tomatoes you get abroad and can't get over here though....for some reason, our supermarkets won't sell ugly but great tasting fresh produce, but that's another story. 

Anyway, the reason I came up with this recipe was to find something to replace fresh tomatoes in a salsa. When I googled, I couldn't 
believe how many different salsa recipe there were, made up with all sorts of different fruits instead of tomatoes. I love fresh pineapple, so decided to go for a pineapple salsa and bung in various left over ingredients I had in the fridge.
  • 1 cup fresh pineapple, diced
  • ½ cup drained tinned sweetcorn (or fresh cooked sweetcorn)
  • ½ cup cucumber, diced
  • ½ small onion, diced finely
  • 1 tbsp picked jalapeño peppers, de-seeded and chopped
  • Fresh chopped coriander/cilantro leaves or flat leaf parsley to taste
  • Juice of half a lime
  • A dash or two of hot chilli sauce (optional)
Mix all of the ingredients together, adding hot chilli sauce and chopped herbs to taste.
Serve with veggie burgers/sausages, Mexican food, barbecued food or with tortilla chips for dipping. Pin It

Tuesday, 24 April 2012

Vegetarian dining in Albufeira, Portugal

As always, I did a bit of foodie research before my recent trip to Portugal, to see what sort of choice we would have when eating out. I found a very helpful website called Algarve Uncovered which has loads of useful information including shopping tips and useful phrases for vegetarians and vegans.

As expected, on our first evening out, we found that meat and fish featured heavily on the Portuguese menus and traditional vegetarian dishes seemed non-existent, in the bustling tourist resort of Albufeira. The ubiquitous chicken piri piri seemed to be the most popular dish - it's a shame that vegetable or mushroom piri piri weren't available! 


Having said that, there were so many different cuisines on offer that vegetarians were fairly well catered for and vegans wouldn't go hungry. Vegetarian pizza and pasta seemed to be on many menus, but if you fancied something more exotic, you could find veggie options in the many Chinese, Indian, British and even Mexican restaurants in the area.


For our first meal out we thought we'd play it safe and try a restaurant with a decent veggie selection on its menu. The girls went for pizza, I ordered spaghetti with Algarve sauce (after checking that the sauce was 'safe'), and Mr O plumped for chicken piri piri, of course.

When my dish arrived, it looked decidedly meaty...yes, you guessed it, they'd put chicken in my pasta sauce! I sent it back, but was rather suspicious about the returning plate minus chicken! 
Needless to say we didn't leave a tip and didn't return there!

One restaurant that deserves a special mention is Eurasia, which is a mainly vegetarian/vegan buffet restaurant just off the main Albufeira strip.  For E6.50 you could choose from a wide range of starters, salads, main courses and a soup of the day. The menu seems to change daily and updates are posted on their Facebook page.  They also offer one meat and one fish dish each day, to attract the hardened carnivores; These dishes were kept separate and covered, so it really didn't have an impact on the veggie-vibe of the place!


The lady who runs the restaurant asked Miss Kahonie if she was vegetarian, and when she confirmed that she was, the lady told her that she would grow up to be more beautiful than the girls who eat meat! I thought that was really sweet, as the girls don't often hear positive comments about being veggie.

We definitely prefer Greece for the range of fresh vegetable-based veggie food available on almost every menu, but Albufeira, Portugal really wasn't too bad!
Pin It

Friday, 13 April 2012

Pesto and Antipasti Puff Pastry Tart

©
You know what it's like when you're due to go food shopping and you've hardly got any fresh ingredients in, but you have a few bits and bobs in the fridge that need using up?  Well that how this tart recipe came about; I had some pesto, half a jar of antipasti, a few olives and some cheese left in the fridge, plus a pack of puff pastry in the freezer. I bunged them all together and came up with this tart!

If you had to go out and buy all the ingredients I used, it would work out quite expensive, so just add whatever needs using up for a cheaper version. If you use fresh vegetables (courgette, peppers, aubergine, mushrooms etc), they need to be lightly pre-cooked to stop the pastry going soggy!


Serves 4-6

  • 1 sheet ready rolled puff pastry
  • 3 tbsps (about half a small jar) vegetarian red or green pesto
  • A handful of olives, sliced
  • Half a jar of vegetable antipasti, drained and chopped (or about 100g/4oz of cooked vegetables)
  • 1 tbsp jalapeño peppers, chopped (optional)
  • Fresh chopped basil
  • 125g/5oz fresh mozzarella, diced or sliced
Pre-heat the oven to 220C/200C Fan/Gas7
Place the pastry on a greased baking sheet.
Score a margin around the pastry, (with a sharp knife) about 2cm in from the edge.
Spread the pesto on the pastry up to the margin.
Top with all the remaining ingredients, finishing with the cheese.


Bake for 10-15 minutes, or until the pastry has puffed up and the cheese is golden brown.

Serve with salad and new potatoes.

Alternatives:
 Make individual tarts by cutting the pastry into 4 or 6 pieces before topping.
Vegan option: Use vegan pastry, sun-dried tomato paste/vegan pesto and a dairy-free melting cheese.

For more vegetarian antipasto recipes pop on over to Tinned Tomatoes.
Pin It

Saturday, 7 April 2012

Simnel Cake


©
I know it's a bit late to post a Simnel Cake recipe, but I didn't have time to make it any earlier. This might not be a traditionally decorated cake in the Christian sense, but as my family doesn't celebrate Easter as such, Miss Ony and I made a welcoming in the spring cake instead! She decorated the cake with her own design, which I think looks lovely, and suitably seasonal.
  • 150g/6oz softened butter or margarine
  • 150g/6oz soft brown sugar
  • 3 medium eggs, beaten
  • 150g/6oz plain flour
  • ½ tsp each of cinnamon and ground mixed spice 
  • 400g/1 lb mixed  dried fruits (eg: raisins, currants, sultanas, glacé cherries and mixed peel)
  • 4 tbsp amaretto or your choice of spirit or liqueur 
  • zest of ½ lemon
  • 1 block of marzipan
Soak the dried fruit in the spirit/liqueur for 2-3 hours or over night.

Preheat the oven to 160C/150C fan/Gas 3
Roll out the marzipan (on a board sprinkled with icing sugar) and cut 2x7" circles using the cake tin as a cutter/template.
Grease and line a 7" round cake tin.

Cream the butter and sugar.
Add all of the remaining ingredients (except the marzipan, of course) and the soaked, dried fruits and mix well.
Spoon half of the mixture into the cake tin.

Place the marzipan onto the cake mixture and press down.
Top with the remaining cake mixture and smooth with the back of a spoon.
Bake for around 1½ hours, or until firm to the touch and brown on top.

Cool in the tin for an hour, then turn out onto a wire rack until cold.
Brush the top of the cake with a little warmed apricot jam or golden syrup.
Place the remaining circle of marzipan on top of the cake and press down.  At this point, or when the cake is fully decorated, you may wish to brown the marzipan under a hot grill/broiller (or use a blow torch as I did).

Get the kids to roll the left over scraps of marzipan either into 11 balls (for a traditional cake) or cut out whatever spring symbols you like (flowers, bunnies, chicks etc). Stick these to the top of the cake with a little water.
Pin It

Friday, 6 April 2012

Aubergine/Eggplant and Cheese Bake

©
Unlike traditional melanzane parmigiana, my aubergine bake doesn't contain Parmesan, although you could use some vegetarian Parmesan-style cheese if you wanted to. I don't salt my aubergines (life's too short to salt an aubergine!), and I only fry them in a little oil  -  well, a little compared to some traditional recipes! The secret to this dish is to cook the aubergines until they are soft, before baking them.

This dish can be prepared in advance and 
chilled over night, so it's great for dinner parties and special occasion meals.
  • 2 large aubergines, sliced into 1cm circles
  • 1 quantity of tomato sauce, made with 1 tbsp fresh chopped parsley and an added pinch of cinnamon - or a jar of good quality ready-made sauce.
  • 100-200g feta/hard goats cheese/mozzarella/vegan melting cheese, sliced or grated
  • ½ tsp dried oregano
Pre-heat the oven to 180C/170C Fan/Gas 4.

Heat a large non-stick frying pan and add 1 tbsp olive oil.

Fry the aubergine slices in batches until golden brown and soft, adding a little more oil to each batch. You can tell when they're done, by pressing down on the aubergine with a spoon or spatula; When they release their juices, they're cooked.

Spoon 1 tbsp of the tomato sauce into the base of each of 4 ramekins and top with a couple of slices of aubergine. Continue layering the sauce and aubergine, until you have either used up all the aubergine or almost run out of space! 

Top with the cheese and a sprinkling of dried oregano.

Put a lid or piece of foil over each ramekin and place on a baking tray.

Bake for 30 minutes, then uncover. Bake for a further 10-15 minutes to allow the cheese to brown a little, and for the sauce to thicken.

Remove
 from the oven and allow to stand for 5-10 minutes before serving.
Serve with pasta or salad and garlic bread.

Suitable for freezing.


Alternatives:
You could make this in one big dish instead of individual ramekins, but I find it's quite difficult to serve if you want to keep it looking nice!
Add a combination of vegetables if you want to. Courgette/zucchini, potato and sweet potato work well with the aubergine. Fry these off in batches as before.

Pin It

Wednesday, 28 March 2012

My kitchen disaster

©
It's strange how you become attached to inanimate objects isn't it? Take my favourite Kitchen Devils knife for example...it could slice, it could chop and it could cut. Now, you may think that most sharp knives can do all three things, (surely that's what knives are designed to do?) but no! I have a selection of about ten different sharp knives...some big, some small and some medium-sized. They are all useful for different jobs, but only my favourite Kitchen Devils knife could do everything.

That was until the day I dropped my beloved knife down the back of the cooker! I'm not quite sure how it happened, but within a blink of the eye it was gone...lost forever! Unfortunately the cooker was pretty much wedged in-between my kitchen units and I couldn't manage to shift it to recover my knife.

I looked for and bought a replacement, but the latest model wasn't quite the same and seemed to slice at an angle.


Well, they say bad luck comes in threes. First my knife disappeared into the back-of-the-oven-abyss. Next my faithful
food processor died, and finally my cooker gave up the ghost. The thermostat blew for the third time, and the cooker repair man advised me that it would be safer to get a new cooker than keep replacing the thermostat.

I chose my new cooker and got it delivered a couple of days later. As the cooker delivery man pulled out the old cooker and disconnected it, I noticed the glint of my knife winking at me from the kitchen floor, as if to say "Here I am, please rescue me!"


So there we are. I've been reunited with my knife, I've bought a new cooker and the world is good again...except I still haven't found a replacement food processor. 


This is my entry for the
Morphy Richards/Foodies 100 Innovator competition.  Pin It

LinkWithin

Related Posts Plugin for WordPress, Blogger...