Showing posts with label lunch. Show all posts

Saturday, 18 March 2017

Saag Paneer Parathas

Saag Paneer Parathas
Unfortunately, work has been taking priority recently and blogging has had to take a back seat. I've been meaning to post for a while and finally managed to finish writing up this recipe...

Although I made it through January without a morsel of cheese passing my lips, I'm afraid to admit that cheese is well and truly back on the menu.

As street food is becoming more and more popular, I thought I'd blog another one of my favourite Indian snack recipes. The same filling could also be used to stuff chapattis, tortillas or even paninis if you prefer. I use a mini-blender to chop all of the spice paste ingredients, but you could chop then by hand if you don't have one.

Fills 4-6 parathas

For the spice paste:
  • 1 medium onion, chopped finely
  • 1-2 green chillis, chopped finely
  • 1 tbsp. fresh ginger, grated
  • 2 large cloves of garlic, crushed
  • 1 tsp black mustard seeds
  • 1 tsp ground cumin
  • 1 tsp ground coriander
  • ¼ tsp turmeric
For the filling:
  • 250g/10oz fresh spinach (or frozen, defrosted)
  • 200g/8oz paneer, cubed
  • 150ml/ cup passata
  • 4-6 frozen, uncooked parathas (check ingredients, if vegan) 
Microwave or steam the spinach as per packet instructions. Cool and squeeze as much liquid out as possible. Chop roughly, if using fresh spinach. 

Heat 1 tbsp vegetable oil on a medium heat.
Fry the paneer for a few minutes, turning regularly, then remove and drain on kitchen paper.
Add the mustard seeds to the pan, along with a drop more oil. Cook for 30 seconds, then add the onion and spice paste.
Cook for 3-5 minutes, until the onion is just starting to colour.
Add the cooked paneer and spinach and stir though.
Add the passata and cook for a further 3-5 minutes, until you have quite a dry, thick filling.

If you have a panini press or George Forman-type grill, heat it up. If not, cook the parathas one at a time in a large frying pan on a high heat.

Take one frozen paratha and heat it for 1-2 minutes on the press/grill/pan. Turn over and fill with a generous spoonful of filling. Fold in half, or roll like a burrito and cook for a further minute or two on each side, until golden brown.

Serve with onion salad and your favourite chutneys.

Vegan version: swap the paneer for a tin of chickpeas to make a chana saag filling.
Top tip:  double the amount of passata to make a saag paneer side dish.

Pin It

Tuesday, 29 November 2016

Pizza with Aubergine and Two Cheeses

This is a really simple dish which I have tried to recreate, after eating it at a local pizzeria. My version cost a fraction of the restaurant version and almost tasted as good...I just need a pizza oven for Christmas!

Make 2 large pizzas
  • 1 quantity basic pizza dough
  • 2 medium aubergines/eggplants, thinly sliced
  • tomato sauce (or tomato puree)
  • fresh basil and dried oregano
  • 2 balls of mozzarella, drained and chopped
  • 100g/4oz parmesan style cheese, thinly sliced or shaved
  • olive oil
Make the dough and tomato sauce.

Heat 1 tbsp. of olive oil in a large frying pan.
Fry the aubergines in batches on a medium-high heat, adding more oil as needed. The aubergine slices need to be soft and golden brown.

Preheat the oven to its hottest setting.

Roll or stretch the dough to make 2 large pizza bases. Place on greased baking sheets.

Top each base with several tbsp. of tomato sauce, then scatter with the chopped mozzarella and herbs.
Arrange the slices of aubergine and parmesan-style cheese over the top.

Bake in a hot oven for 8-12 minutes, or until the cheese is bubbling and the base is golden brown.

Vegan version: Omit the mozzarella, sprinkle the tomato sauce on each pizza with 2 tbsp. of nutritional yeast flakes. Top with the aubergine and drizzle with a little more olive oil before baking.


Pin It

Sunday, 30 October 2016

Spicy Paneer & Vegetable Spring Rolls

Although spring rolls are normally considered a Chinese delicacy, these Indian-inspired creations are quite different in taste. After eating some of these crispy morsels at a local cafe, I thought I'd have a go at making them myself, whilst watching the Diwali fireworks going off in my neighbourhood.

So long as you can buy ready-made spring roll pastry, they're simple enough for kids or any novice cook to prepare, but look quite impressive.
  • 2 cups (around 225g/9oz) paneer, crumbled or grated
  • 1 cup each of frozen or tinned petits pois and sweetcorn
  • 1 tsp freshly-grated ginger
  • 1 crushed clove of garlic 
  • 1 green chilli, finely chopped
  • 1 tbsp fresh, chopped coriander
  • 1 tsp garam masala
  • ½ tsp cumin seeds
  • ½ tsp fennel seeds
  • ½ tsp chat masala (optional, but worth using if you can find it)
  • 10 sheets of spring roll pastry
  • vegetable oil, for frying
First make a flour/water paste using 1 tsp flour to 1 tbsp water (this is your 'glue' for the pastry).

Mix all of the filling ingredients together in a large bowl.
Take one spring roll sheet and place a heaped tablespoon of mixture by one corner (see photos above).
Spread a little of the paste along the opposite two edges.
Fold the bottom corner of pastry over the filling and roll once.
Fold in each side of the wrapper and roll towards the far corner (like a burrito).
Repeat until all of the filling has been used up.

Heat a good glug of vegetable oil in a large frying pan, on a medium-high heat. Shallow fry the spring rolls in two batches, cooking for 2-3 minutes on each side. Drain well on kitchen roll and keep warm in the oven.
Alternatively, brush generously with vegetable oil and bake in the oven at 190C/180C Fan/Gas 5/375F for 10 to 15 minutes, turning once.

Serve hot or warm with salad and your favourite chutneys/pickles, or try my Indian restaurant style mint sauce and onion salad.
To make this into a main meal, simply serve with rice and dhal.
Meat Free Mondays

Vegan variation: swap the paneer for 2 cups of mashed potato.
Filling variations: to make the paneer filling go further, add two cups of mashed potato and double the spice quantities.
Swap the peas and sweetcorn for cooked chickpeas (chana) if you prefer.  

Suitable for freezing. Batch cook in advance and freeze if you are cooking for large numbers over Diwali, Eid, Christmas or any other celebrations!

I'm adding this post to the Meat Free Mondays linky at Tinned Tomatoes.

Pin It

Sunday, 8 May 2016

Freekeh Salad with Pomegranate Molasses Dressing - Suma Blogger's Network

Superfood Salad
This is my first attempt at a superfood salad, and I'm pretty pleased at how well it turned out... It's packed full of protein, fibre and vitamins, but still tastes great!

Thanks to the Suma Blogger's Network, I get to try out lots of weird and wonderful, new vegetarian products. This time, freekeh and pomegranate molasses were amongst my picks. For those of you who don't know, freekeh, pronounced free-ka (young, green wheat which is cracked and roasted), is considered both an ancient grain and a super-grain. It has a high fibre and protein content and is very versatile as it can be served hot or cold in place of other grains such as rice or quinoa.
Pomegranate molasses was a revelation to me, as it was far more tangy and flavoursome than I anticipated (I thought it would be sweet!), and gives a great sweet and sour flavour to a dressing.

Serves 4 as a lunch or side salad; 2 as a main meal

For the salad

  • 1 cup freekeh from Suma
  • 2 cups veg stock
  • 2 tbsp olive oil
  • ½ can chickpeas, drained and rinsed
  • ½ teaspoon lightly toasted cumin seeds, ground, more to taste
  • 2 bell peppers,deseeded and cut into chunks
  • 2 cups of butternut squash or sweet potato, peeled and cubed
  • 1 cup of button mushrooms, halved
  • 4 tbsp pine nuts
  • 1 garlic clove, crushed
  • a small bunch of chopped, fresh mint
  • ½ cup crumbled feta (optional)

For the dressing

  • 1 tbsp lemon juice
  • 2 tbsp pomegranate molasses from Suma
  • 1 tbsp extra-virgin olive oil 

Preheat the oven to 200C/180C Fan/Gas 6/400F

Put the peppers and squash into a roasting pan and drizzle with 2 tbsp olive oil.
Roast for 20-30 minutes until softened and starting to brown.
Add the mushrooms, chickpeas, pine nuts, cumin seeds and crushed garlic and return to the oven for a further 5 minutes.
Remove from the oven and allow to cool for around 15 minutes.

Meanwhile, put the freekeh and stock into a large pan. Bring to the boil, then reduce the heat to a simmer.
Simmer, with the lid on, for 20-25 minutes, or until the grain is soft and just starting to break up.
Drain well and allow to cool for around 15 minutes.

Mix the dressing ingredients together and stir into the warm freekeh.

When the freekeh and vegetables are still just warm (but not hot!), mix together to combine.
Add the mint and feta, if using.


Suma Bloggers' Network
Serve warm or cold.

Keeps for up to 3 days in the fridge; not suitable for freezing.

Vegan option: Omit the feta or swap for vegan feta or halved olives.

Integrity Statement
As a member of the Suma Blogger's Network, I will receive a selection of complimentary products from Suma every two months, to use in recipe development, and will blog an original recipe for the Network. 


Pin It

Sunday, 3 January 2016

Packed Lunch Pizzas

So, it's back to school tomorrow, and as Miss K isn't too fond of sandwiches any more, I've made a batch of mini pizzas for her packed lunches.

I've recently been converted to baking with fresh yeast as it makes a softer bread, which stays fresh for longer; I buy my fresh yeast, from Ocado and then freeze it (you might be able to buy it from your local bakery or supermarket), but you can easily substitute it for dried.

Makes 8 small pizzas (each pizza serves two young children or one teen/adult)

  • 1 cup cold water
  • 2 cups strong white bread flour
  • 1 cup strong wholemeal bread flour
  • 12.5g fresh yeast or ½ sachet dried yeast
  • 1 tbsp olive oil
  • ½ tsp salt
  • ½ tsp sugar

Toppings

  • tomato puree
  • dried herbs/oregano
  • grated mozzarella
  • olives
  • finely chopped/sliced vegetables

Put all of the dry ingredients in a bowl (or bread maker) add the wet ingredients
Mix well until you have a smooth dough (on dough setting in bread maker).
Add a little more flour if the dough is too sticky.
Cover the bowl and allow to rise in a warm place for 30-60 minutes (or allow dough cycle to run).

Preheat oven to 220C/200C/Gas 7/425F

Divide dough into 8 pieces. Flatten into 7" circles, spaced well apart on greased baking sheets. Spread with tomato puree and sprinkle with dried herbs. Add cheese and toppings and bake for 8-10 minutes.
Place onto a wire rack to cool.

When cool, pack into a freezer bag and freeze until needed.

Simply remove one or more pizzas as required, defrost for 15 minutes at room temperature, slice and pack in your lunchbox.

Vegan option: Swap the mozzarella for your preferred dairy-free, melting cheese.

Pin It

Winter Slaw Salad with Apple, Celery & Cucumber

As, I joined in with Veganuary the past couple of years, but then reverted back to being vegetarian pretty soon afterwards, I thought I'd try something a little different this year. Instead of cutting out eggs and dairy, I thought I'd try reducing them instead (alongside meat substitutes), whilst trying to eat more raw/whole foods, fresh fruit & vegetables and pulses...

This seasonal salad is a great way to get an extra one or two portions of fruit and veg in, if served alongside a carb-based main meal.
  • 1 firm eating apple, cored and sliced
  • ½ cucumber, de-seeded and sliced
  • 2 sticks of celery or ½ bulb fennel sliced
  • 25g/1oz chopped walnuts
  • 1 tbsp mayonnaise or vegan mayo (or vinaigrette made with 1 dsp olive oil mixed with 1 dsp white wine vinegar)
  • A little fresh, chopped dill or parsley
 NCRPrepare the apple and place in acidified water (a bowl of water with 1 tsp lemon juice), whilst you prepare the other ingredients.
Drain the apple and blot dry with kitchen town.
Place all of the ingredients into a bowl and stir in the mayo or dressing.
Refrigerate until needed

.I'm entering this recipe to this month's No Croutons Required Challenge, co-hosted by Jacqui at Tinned Tomatoes and Lisa at Lisa's Kitchen
Pin It

Wednesday, 2 September 2015

Puff Pastry Empanadas with Black Beans

Puff Pastry Empanadas with Black Beans
These quick and easy veggie empanadas make an idea starter or tapas dish. They would also work well in kids' lunch-boxes, as an alternative to sandwiches.
Obviously you can make your own pastry if you have time, or use shortcrust pasty if you prefer.

Makes 18-20 small empanadas

  • 1 red onion, finely diced
  • 1 large, or 2 small bell peppers, diced 
  • 1 large clove of garlic, crushed
  • 1 fresh chilli, de-seeded and finely diced, optional
  • 2 tsp ground cumin
  • ½ tsp smoked or plain paprika
  • 1 tin black beans, rinsed and drained
  • 2 tbsp chopped, fresh coriander
  • 100g/4oz Monterey Jack or Cheddar cheese, diced
  • 500g/1lb pack of ready made puff pastry
  • 1 egg, beaten
Gently fry the onion, garlic and bell pepper in a little oil, until soft. Add the herbs and spices, and cook for a further minute. Set to one side to cool.
When cool, stir in the chunks of cheese.

Pre-heat the oven to 220°C/Fan 200°C/Gas Mark 7/425°F

Roll out the pastry as thinly as possible, on a lightly floured board.
Using a large cutter (10-12.5cm/4-5") or small plate/bowl and a sharp knife, cut as many circles from the pastry as you can. Re-roll any scraps of pastry and repeat.

Brush the perimeter of each circle with beaten egg.
Spoon 2 tsp of the filling into the middle of each piece.
Fold the pastry carefully over the filling, to make a semi-circle.
Press firmly to seal, then crimp with a fork, or by folding the edge over in the traditional way (YouTube tutorial here!).
Brush each mini-pasty with beaten egg to glaze.
Bake for 12-15 minutes, or until the pastry has puffed up and turned golden brown.
Remove from the oven and cool on a wire tray.
Eat warm or cold with your favourite dips.

Suitable for freezing. Defrost before re-heating.

Vegan version
Most brands of puff pastry are vegan, so this recipe is easy to veganise. Swap the dairy cheese for your preferred alternative, or omit and add some extra beans or vegetables. Seal the empanadas with a little water and brush lightly with olive oil to glaze.

Top tip: If you don't have time to make empanadas, use the same filling for quesadillas - just pop 2-3 tbsp of the beany mixture onto a tortilla, fold in half and pop in a sandwich press or hot pan for a few minutes to warm through and melt the cheese.

Although I haven't attempted to make my own puff pastry, I'm linking this post to Lisa and Jen's Pastry Challenge, hosted this month at United Cakedom.

Pin It

Sunday, 12 October 2014

Peanut & Tamarind Falafels for National Curry Week

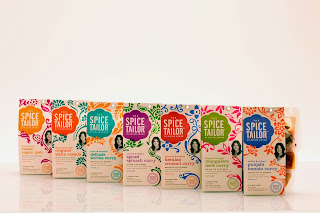
 The Spice Tailor sauce range
 The Spice Tailor chutni rangeAs you may have realised, my family all love Indian food. So we were excited to find out that Anjum Anand's The Spice Tailor range has now been extended to include a delicious array of curry sauces plus a tasty selection of chutnis. I've been testing out the whole range on my family over the past couple of weeks and they've been really impressed how tasty and authentic the sauces are. I've also loved how quick and easy they are to use.

I've been experimenting with different variations of falafels lately and decided to come up with an Indian-inspired version for National Curry Week, using The Spice Tailor products. I used two varieties from the new chutni range, which are a delicious addition to almost any Asian meal, either as a condiment or as an ingredient.

Makes 12
  • 1 tin of chickpeas, drained
  • 5 tbsp Spice Tailor peanut & tamarind chutni
  • 1 large clove of garlic, crushed
  • 1-2 tsp chilli paste/ hot chilli sauce
  • 1-2 slices of wholemeal bread, made into breadcrumbs
Peanut & Tamarind Falafels

Put all of the ingredients, except the breadcrumbs, into a food processor and blend for a minute or so. Scrape the ingredients down from the sides of the bowl and repeat until you have a fairly smooth mixture.
Add just enough breadcrumbs to form a fairly stiff, but not dry, mixture.
Roll into 12 balls and flatten slightly.
Chill in the fridge for around half an hour.

Heat 2 tbsp of vegetable oil in a large frying pan, on a medium heat.
Cook the falafels for around 4-5 minutes on each side until lightly browned.

Wrap in a chapatti with salad and your favourite dip, sauce or chutney; I served mine with onion salad and mint sauce:

Onion salad
  • 1 tsp Spice Tailor mint leaf chutni
  • 1 small onion, halved and very finely sliced
  • 1" cucumber, halved, deseeded and finely sliced
Indian mint sauce
  • 1 tbsp Spice Tailor mint leaf chutni
  • ½ cup natural or vegan plain yogurt
  • a pinch of sugar, optional
The Spice Tailor range is available from most major UK supermarkets and online.
I received a selection of complimentary products from The Spice Tailor to review and to use in recipe development. All views expressed are my own and those of my family.
Pin It

Saturday, 7 June 2014

Greek-Style Tortilla/Taco Salad with Halloumi

Greek-style taco salad with halloumi

After making my first ever tortilla bowls a couple of weeks ago, I decided to experiment further and tried making microwaved bowls (see tutorial below)The wraps puffed up slightly, so maybe corn tortillas are a better option, but they went nice and crispy and worked very well as an alternative to toasted pittas with this Greek-inspired salad.

You will need:
  • 4 tortilla wraps, microwaved as below and allowed to cool
  • 1 pack of halloumi, sliced into 8 and grilled or barbecued
  • Your choice of fresh salad ingredients (I used lettuce, tomato, onion, bell pepper and cucumber)
Dressing: (mix all ingredients together)
  • 1 tbsp olive oil
  • 1 crushed clove of garlic
  • 2 tbsp lemon juice
  • 1 tbsp chopped fresh parsley
  • A little black pepper
To make the tortilla/taco bowls:
Microwave one tortilla wrap at a time for 15-30 seconds on high, to soften.
Brush or wipe one side of each wrap with a little oil.
Place oiled-side-down into a heat-proof dish, pleating the wrap gently so that it fits inside the bowl.
Remove from the bowl and dry out the wrap in a medium oven for around 5 minutes, before cooling on a wire rack. 
microwaved tortilla bowls
Fill each tortilla bowl with salad ingredients. Top with the warm halloumi and drizzle the dressing over.
Serve immediately with your favourite dips.

Vegan option: swap the halloumi for vegan falafels.
Alternatives: Vary the salad ingredients and toppings, to make Mexican or Indian-inspired salads.

 Family Foodies
 NCRI'm entering this recipe to this month's No Croutons Required Challenge, co-hosted by Jacqui at Tinned Tomatoes and Lisa at Lisa's Kitchen

I'm also adding it to 
June's Family Foodies co-hosted by Eat Your Veg and Bangers & Mash


Pin It

Wednesday, 2 April 2014

Aloo Tikki

Aloo tikki are small, spicy potato and pea croquettes.These traditional Indian snacks are delicious eaten hot or cold with chutneys or mint sauce and also make a great an addition to an Indian buffet. They're really cheap to make and are vegan too. I added sweet potato to mine, to ring the changes.

Makes 12/Serves 4
  • 2-3 medium potatoes, peeled and cut into chunks
  • 1 medium sweet potato, peeled and cut into chunks
  • 1 small onion, grated
  • 1 large clove of garlic, crushed
  • 1 heaped tsp freshly grated ginger
  • ½ tsp cumin seeds
  • 1 tsp garam masala or chaat masala
  • 1 tsp finely chopped fresh chilli
  • ½ tsp turmeric
  • a handful of frozen petit pois or peas
  • 1 tbsp chopped coriander leaves
  • 1 slice of wholemeal bread, made into breadcrumbs
  • a few slices of (ready-made) melba toast crushed into breadcrumbs (or fine/panko breadcrumbs)
  • vegetable oil
Boil the potatoes for around 15 minutes, until soft. Drain and mash.
Meanwhile heat 1 tbsp vegetable oil in a pan on a medium heat. Add the cumin seeds and fry for minute. 
Add the onion, ginger, garlic and the rest of the spices and cook for a further 3-4 minutes.
Mix in the mashed potatoes, petit pois and chopped coriander, plus enough fresh breadcrumbs to bind and make a dough-like consistency.
Shape into slightly flattened balls using your hands and roll in the dried breadcrumbs. 
Leave in the fridge for 10 minutes or so, to firm up.

Heat a further tbsp of oil in a large frying pan. 
Fry the aloo tikki for 5 minutes on each side, until golden brown.
Keep warm in the oven and repeat until all of the croquettes have been cooked.

Serve with salad, chutneys or mint sauce.

Suitable for freezing (before or after frying).

Alternatives: Make large, flat tikkis and serve them in buns like veggie burgers.
Bake on a greased baking tray (in a hot oven) for a low-fat version.

Pin It

Saturday, 13 July 2013

Vegetarian 'Hawaiian' Quesadillas

Vegetarian 'Hawaiian' Quesadillas
©
When I was growing up, fresh pineapple was considered positively exotic! We might have had tinned pineapple in fruit salads, or maybe on a Hawaiian pizza, but that was about it. Apparently pineapple on pizza isn't exactly traditional in Hawaii though, so apologies to any Hawaiian readers and especially to Little Ferraro Kitchen

Although I now love fresh pineapple, I hadn't thought of putting it in a sandwich; I came up with this simple veggie/vegan wrap combo after being inspired by a similar meat-based dish on Closet Cooking. I wasn't sure if the flavours would work with a meat substitute, but they really do. Coincidentally, Ephee has recently blogged an alternative vegan version over on her amazing blog: L'éphémère quotidienneté des repas et autres trucs de magie.

These quesadillas are really quick and easy to make, so are great for lunches and camping trips. 

Makes 4
  • 4 slices of vegetarian/vegan bacon/ham, cooked if preferred and chopped
  • 2-4 thin slices of pineapple (fresh is best, but tinned will do), chopped
  • 2 tbsp pickled jalapenos, chopped (optional)
  • 200g/8oz mozzarella/cheddar/vegan melting cheese
  • 4 tbsp tomato puree/tomato salsa/bbq sauce
  • 4 tortilla wraps
Fry or grill the veggie bacon/ham until lightly browned (this is optional, but I prefer it crispy!).
Spread half of each tortilla with a spoonful of tomato puree or your preferred alternative.
Divide the remaining ingredients between each wrap.
Fold the wraps in half and heat through until the cheese has melted, either in a hot pan or in a panini press/grill.
Slice into wedges and serve with salad.

Pin It

Saturday, 10 November 2012

Savoury Cheese Muffins

savoury muffins
©
These savoury muffins take just minutes to make, and taste delicious served warm with home made soup. They are also a great addition to packed lunches and picnics.
  • 2 cups hard, tasty cheese (e.g. extra mature cheddar, hard goat's cheese), grated 
  • 2 cups self raising flour
  • 1 level tsp paprika
  • 1 level tsp English mustard powder
  • ½ tsp dried oregano
  • 2 medium eggs
  • 1 cup milk
  • ½ level tsp bicarbonate of soda
  • ½ cup chopped vegetable anti-pasti (e.g. olives, sun-dried tomatoes, roasted peppers)
Mix the eggs and milk together.
Put all of the dry ingredients in a bowl and add the egg and milk mixture. Stir gently to combine. 
Spoon mixture into a well greased muffin tin. 
Bake at 200C/190C Fan/Gas 6/400F for 12-15 mins, or until firm and golden brown. 
Leave to cool for a few minutes and then loosen around each muffin with a knife before turning out and cooling on a wire rack.
Best eaten warm on the day you've made them.

Suitable for freezing.

Alternatives: Bake mini, bite-size muffins for parties. Reduce the cooking time to 8-10 minutes. 
Pin It

Friday, 5 October 2012

Green Vegetable Burritos

©
I'm not sure if these are strictly burritos or not, but whatever they're called, they make a nice quick and healthy snack or lunch. You can of course, vary the vegetables depending on what you have available.

Makes 4

  • 2 medium courgettes/zucchini, quartered lengthwise and sliced
  • 1 large green pepper, deseeded and sliced
  • 75g/3oz spinach, washed
  • 1 clove of garlic, crushed
  • 1-2 tsp mild chilli powder
  • ½ tsp dried oregano
  • 1 tbsp pickled jalapeños chopped
  • 1 cup of grated hard cheese/vegan cheese
  • 1 tbsp chopped fresh coriander/cilantro (optional)
  • 4 corn tortilla wraps
Heat 1 tbsp olive oil in a pan. 
Fry the courgette and pepper until softened and just starting to brown.
Add the garlic, herbs, jalapeños and chilli powder and stir well.
Throw in the spinach and coriander and allow to wilt for a minute or two.

Heat the tortillas until warm (in a pan, microwave or oven). 
Fill with the vegetable mixture and a sprinkle of cheese, fold and eat!

If you have more time, you could make your own 
flatbread wraps.

Jacqueline at Tinned Tomatoes is hosting a sandwich themed No Croutons Required this month, which is handy, as I wrote this post just before I found out the theme!

Pin It

Thursday, 20 September 2012

Spinach, Red Pepper and Goat's Cheese Quiche

The name of this recipe has given me a headache, as I'm a bit of a stickler for apostrophes being in the right place. Should I use goat's cheese, goats' cheese or just plain old goats cheese in this quiche? I came to the conclusion that goats' cheese was correct, as the milk making the cheese must come from more than one goat, however after googling and reading this amusing article, I've gone for goat's cheese. Please do leave me a comment, if you object to this and think I should have gone for goats' cheese after all!

Easy Pastry
  • 200g/8oz plain flour
  • 100g/4oz cold block butter, cut into cubes
  • cold water 
Rub the butter into the flour until it resembles fine breadcrumbs (or blitz in the food processor for a few seconds. Add just enough cold water to bring the mixture together into quite a firm dough (I used 4 tbsp).
Wrap in cling-film and chill for at least an hour.

Pre-heat the oven to 190 C/180 C Fan/ Gas 5/375 F
Roll out the pastry on a floured board and line a greased 20cm/8" sandwich cake tin or flan tin.
Bake blind for 12-15 minutes or until it's just starting to colour.
Remove from the oven and reduce the heat to 170 C/160 C Fan/ Gas 3/325 F

Filling
  • 1 red onion, cut in half and sliced finely
  • 1 large red bell pepper, de-seeded and sliced finely
  • 75g/3oz washed baby spinach
  • 75g/3oz soft or hard goat's cheese (chopped or grated)
  • 150ml/5 fl oz double cream
  • 2 medium eggs, beaten
  • ½ tsp ground fennel seeds
  • Black pepper to taste
  • 1 tbsp chopped fresh dill
Heat 1 tbsp olive oil in a frying pan. Add the fennel seeds, black pepper, onion and red pepper and saute until the vegetables are soft and just starting to colour. Then add the spinach leaves and chopped dill and allow to wilt for a minute or two. Remove from the heat.

Mix the eggs, cream and cheese together.

Spoon the vegetables into the pastry case.
Pour the egg mixture over.
Bake for 20-25 minutes or until the filling is golden brown and set firmly.
Serve hot, warm or cold with sautéed new potatoes and salad.

Suitable for freezing.

Alternatives: You could use almost any combination of vegetables in this quiche.
Pin It

Thursday, 14 June 2012

Nachos with Vegetable Salsa

Now this might not sound like much of a recipe, but it's a good way of making a quick snack or light meal out of left-over vegetables and store cupboard ingredients. For a healthier version, use the refried beans and salsa mixture to fill tortilla wraps.

Serves 4 as a main course or 8 as a starter/snack

  • 1 bag of lightly salted or unsalted tortilla chips
  • 1 can of mild refried beans
  • 1 carton/jar of mild tomato salsa (around 1 cup)
  • 1 small onion , finely diced
  • 1-2 bell peppers, finely diced
  • A few mushrooms, finely diced
  • 1 tsp mild chilli powder
  • 100g mozzarella or cheddar cheese, grated (or vegan melting cheese)
Pre-heat the oven to 180C/170C Fan/Gas 3
Tip the bag of tortilla chips onto a baking tray.
Using a spoon, dollop the refried beans over the chips - spread out a little if you can without breaking too many of the chips! 
Fry the onion in a drop of olive oil until softened, then add the chilli powder, bell peppers and mushrooms and cook for a further couple of minutes.
Add around 1 cup of salsa to the pan and stir in.
Simmer for 5 minutes.
Remove from the heat. Taste and add more chilli powder if needed.
Pour the salsa mixture over the tortilla chips and sprinkle the grated cheese over the top.
Cook for 10-15 minutes, until the cheese is bubbling.

Serve with salad.


Alternatives:
If you don't have any refried beans, use a drained tin of baked beans instead and add these to the salsa mixture.
Pin It

Friday, 13 April 2012

Pesto and Antipasti Puff Pastry Tart

©
You know what it's like when you're due to go food shopping and you've hardly got any fresh ingredients in, but you have a few bits and bobs in the fridge that need using up?  Well that how this tart recipe came about; I had some pesto, half a jar of antipasti, a few olives and some cheese left in the fridge, plus a pack of puff pastry in the freezer. I bunged them all together and came up with this tart!

If you had to go out and buy all the ingredients I used, it would work out quite expensive, so just add whatever needs using up for a cheaper version. If you use fresh vegetables (courgette, peppers, aubergine, mushrooms etc), they need to be lightly pre-cooked to stop the pastry going soggy!


Serves 4-6

  • 1 sheet ready rolled puff pastry
  • 3 tbsps (about half a small jar) vegetarian red or green pesto
  • A handful of olives, sliced
  • Half a jar of vegetable antipasti, drained and chopped (or about 100g/4oz of cooked vegetables)
  • 1 tbsp jalapeño peppers, chopped (optional)
  • Fresh chopped basil
  • 125g/5oz fresh mozzarella, diced or sliced
Pre-heat the oven to 220C/200C Fan/Gas7
Place the pastry on a greased baking sheet.
Score a margin around the pastry, (with a sharp knife) about 2cm in from the edge.
Spread the pesto on the pastry up to the margin.
Top with all the remaining ingredients, finishing with the cheese.


Bake for 10-15 minutes, or until the pastry has puffed up and the cheese is golden brown.

Serve with salad and new potatoes.

Alternatives:
 Make individual tarts by cutting the pastry into 4 or 6 pieces before topping.
Vegan option: Use vegan pastry, sun-dried tomato paste/vegan pesto and a dairy-free melting cheese.

For more vegetarian antipasto recipes pop on over to Tinned Tomatoes.
Pin It

Tuesday, 31 January 2012

Mushrooms Stuffed with Leek and Cheese


These stuffed mushrooms can be eaten as a starter, lunch or main meal, depending on what you serve with them (and how many you eat!).
  • 8 large flat mushrooms (Portabello type)
  • 1 leek, finely chopped
  • 2 slices of bread, made into breadcrumbs
  • 1 clove of garlic, crushed
  • 1 tbsp chopped fresh parsley
  • 1 tsp paprika
  • 100g/4oz grated hard cheese (Cheddar, Emmental, Gruyere etc.)
Peel the outer skin from the mushrooms and remove the stalks.
Chop the stalks finely.

Gently fry the leeks and mushroom stalks in a little melted butter or olive oil, for about 5 minutes (or microwave on a medium setting in a covered bowl).
Add the garlic, paprika and herbs and cook for a further minute.
Stir in the cheese and breadcrumbs and stir well to combine all of the ingredients.
Meanwhile drizzle the mushrooms with a little olive oil and grill or cook in a hot oven (200C/190C Fan/Gas 6) for around 5-10 minutes, turning once.
Top each mushroom with a heaped tablespoon of mixture.
Press the stuffing down using your hands, so that it sticks to the mushrooms.
Return to the grill/oven for a further 5-10 minutes until golden brown.

Alternatives: This stuffing mixture can also be use to stuff courgettes, pointed sweet peppers etc. Adjust the cooking times to allow the vegetables to almost cook through before stuffing.
Vegan version: swap the dairy cheese for vegan cheese, or use 4 tbsp olive oil, to moisten the breadcrumb mixture. Pin It

Friday, 9 December 2011

Aubergine and Feta Dip

©
This isn't the prettiest looking dip, but what it lacks in beauty, it makes up for in taste! In Greece it's know as aubergine salad.
Serve as part of a buffet/meze.
  • 1 large aubergine/eggplant
  • 100g/4oz feta cheese
  • 1 large clove of garlic
  • 25g/1oz olives, chopped (optional)
  • 1 tbsp extra virgin olive oil
  • 1 tbsp fresh lemon juice
  • ½ tsp smoked paprika (or to taste)
Prick the aubergine all over with a sharp knife (to stop it exploding!).
Grill the aubergine under a hot grill, turning every few minutes, until the skin is black and the aubergine is soft.
Allow to cool and then peel the blacked skin off and discard. Blot the aubergine flesh on kitchen paper to remove excess liquid.
Blend all ingredients together. Blend briefly for a pate-type texture or blend thoroughly if you prefer a smooth dip. 
Sprinkle with a little dried mint, or some fresh, chopped herbs and chill until needed.

Not suitable for freezing.

Alternatives: Try making this dip with roasted butternut squash, sweet potato or cooked and mashed pulses instead of the aubergine.
Vegan option: Omit the cheese for a vegan dip. Pin It

LinkWithin

Related Posts Plugin for WordPress, Blogger...