Showing posts with label Indian. Show all posts

Saturday, 18 March 2017

Saag Paneer Parathas

Saag Paneer Parathas
Unfortunately, work has been taking priority recently and blogging has had to take a back seat. I've been meaning to post for a while and finally managed to finish writing up this recipe...

Although I made it through January without a morsel of cheese passing my lips, I'm afraid to admit that cheese is well and truly back on the menu.

As street food is becoming more and more popular, I thought I'd blog another one of my favourite Indian snack recipes. The same filling could also be used to stuff chapattis, tortillas or even paninis if you prefer. I use a mini-blender to chop all of the spice paste ingredients, but you could chop then by hand if you don't have one.

Fills 4-6 parathas

For the spice paste:
  • 1 medium onion, chopped finely
  • 1-2 green chillis, chopped finely
  • 1 tbsp. fresh ginger, grated
  • 2 large cloves of garlic, crushed
  • 1 tsp black mustard seeds
  • 1 tsp ground cumin
  • 1 tsp ground coriander
  • ¼ tsp turmeric
For the filling:
  • 250g/10oz fresh spinach (or frozen, defrosted)
  • 200g/8oz paneer, cubed
  • 150ml/ cup passata
  • 4-6 frozen, uncooked parathas (check ingredients, if vegan) 
Microwave or steam the spinach as per packet instructions. Cool and squeeze as much liquid out as possible. Chop roughly, if using fresh spinach. 

Heat 1 tbsp vegetable oil on a medium heat.
Fry the paneer for a few minutes, turning regularly, then remove and drain on kitchen paper.
Add the mustard seeds to the pan, along with a drop more oil. Cook for 30 seconds, then add the onion and spice paste.
Cook for 3-5 minutes, until the onion is just starting to colour.
Add the cooked paneer and spinach and stir though.
Add the passata and cook for a further 3-5 minutes, until you have quite a dry, thick filling.

If you have a panini press or George Forman-type grill, heat it up. If not, cook the parathas one at a time in a large frying pan on a high heat.

Take one frozen paratha and heat it for 1-2 minutes on the press/grill/pan. Turn over and fill with a generous spoonful of filling. Fold in half, or roll like a burrito and cook for a further minute or two on each side, until golden brown.

Serve with onion salad and your favourite chutneys.

Vegan version: swap the paneer for a tin of chickpeas to make a chana saag filling.
Top tip:  double the amount of passata to make a saag paneer side dish.

Pin It

Wednesday, 28 December 2016

Keralan Vegetable Stew

Keralan Vegetable Stew, Vegan
This South Indian vegetable curry is made with a thin, aromatic, spiced coconut-milk sauce so it's more like a soup or stew than a traditional, British curry. The flavours are also more akin to Thai cuisine than a North Indian-style curry, but this recipe utilises seasonal, British vegetables, so it's very economical.

Although it's not exactly fat-free or low in calories, it makes a delicious, warming and vegan start to the New Year, especially if you're doing Veganuary.

Serves 4
  • 1 onion, chopped 
  • 1 stick of cinnamon
  • 4 green cardamoms, pierced with a knife or lightly crushed with your thumb
  • a sprig of fresh or dried curry leaves
  • 2 large cloves of garlic, crushed
  • 1 tbsp. grated, fresh ginger
  • 2 thin, green chilies, slit in half
  • 2 medium potatoes, peeled and cut into small chunks
  • 2 medium carrots, peeled and cut into batons or slices 
  • 1 cup of green beans, cut into 1"/2.5cm pieces
  • 2 cups of sliced mushrooms
  • 2 cups of broccoli florets or 1 cup of frozen peas
  • 1 tin coconut milk
  • ½ cup boiled water, optional
  • 1 tsp sugar, optional
Heat 1 tbsp. vegetable oil in a large saucepan.
Add the onion and whole spices and cook for a few minutes on a medium heat.
Add the garlic, ginger and chillies and cook for a further 2 minutes.
Throw in the green beans and potatoes along with the coconut milk.
Simmer for 10 minutes with the lid on, until tender.
Add the mushrooms and broccoli/peas and simmer for a further 5 minutes.
Season with salt, black pepper and sugar, to taste.
Add some of the water to thin the sauce if needed.

Serve with rice, appam, roti or paratha.

Pin It

Sunday, 30 October 2016

Spicy Paneer & Vegetable Spring Rolls

Although spring rolls are normally considered a Chinese delicacy, these Indian-inspired creations are quite different in taste. After eating some of these crispy morsels at a local cafe, I thought I'd have a go at making them myself, whilst watching the Diwali fireworks going off in my neighbourhood.

So long as you can buy ready-made spring roll pastry, they're simple enough for kids or any novice cook to prepare, but look quite impressive.
  • 2 cups (around 225g/9oz) paneer, crumbled or grated
  • 1 cup each of frozen or tinned petits pois and sweetcorn
  • 1 tsp freshly-grated ginger
  • 1 crushed clove of garlic 
  • 1 green chilli, finely chopped
  • 1 tbsp fresh, chopped coriander
  • 1 tsp garam masala
  • ½ tsp cumin seeds
  • ½ tsp fennel seeds
  • ½ tsp chat masala (optional, but worth using if you can find it)
  • 10 sheets of spring roll pastry
  • vegetable oil, for frying
First make a flour/water paste using 1 tsp flour to 1 tbsp water (this is your 'glue' for the pastry).

Mix all of the filling ingredients together in a large bowl.
Take one spring roll sheet and place a heaped tablespoon of mixture by one corner (see photos above).
Spread a little of the paste along the opposite two edges.
Fold the bottom corner of pastry over the filling and roll once.
Fold in each side of the wrapper and roll towards the far corner (like a burrito).
Repeat until all of the filling has been used up.

Heat a good glug of vegetable oil in a large frying pan, on a medium-high heat. Shallow fry the spring rolls in two batches, cooking for 2-3 minutes on each side. Drain well on kitchen roll and keep warm in the oven.
Alternatively, brush generously with vegetable oil and bake in the oven at 190C/180C Fan/Gas 5/375F for 10 to 15 minutes, turning once.

Serve hot or warm with salad and your favourite chutneys/pickles, or try my Indian restaurant style mint sauce and onion salad.
To make this into a main meal, simply serve with rice and dhal.
Meat Free Mondays

Vegan variation: swap the paneer for 2 cups of mashed potato.
Filling variations: to make the paneer filling go further, add two cups of mashed potato and double the spice quantities.
Swap the peas and sweetcorn for cooked chickpeas (chana) if you prefer.  

Suitable for freezing. Batch cook in advance and freeze if you are cooking for large numbers over Diwali, Eid, Christmas or any other celebrations!

I'm adding this post to the Meat Free Mondays linky at Tinned Tomatoes.

Pin It

Sunday, 7 June 2015

Indian Restaurant-Style Mint Sauce and Onion Salads

Indian Restaurant-Style Mint Sauce and Onion Salad
I've been trying to re-create the onion salad or chutney that we get with poppadoms in our local Indian/Bangladeshi restaurants. There are two types; one is quite plain with a bit of cucumber and tomato; the other has a sweet and spicy red sauce. The 'secret' ingredient in both recipes is chopped coriander, which complements the mint.

I've previously blogged my mint sauce dip, but thought I'd add it here too.

Each recipe serves 4-6 with poppadoms, bhajis or samosas. They also go well with vegetarian barbecued food.

Red, sweet onion salad
  • 2 medium white onions, diced into approx 1cm pieces
  • 2 tbsp tomato ketchup
  • 2 tbsp mango chutney (sweet or spicy depending on preference)
  • 1 tbsp tomato purée/paste
  • 1 tsp unsweetened mint sauce concentrate (Colemans)
  • 2 tsp chopped fresh or frozen coriander leaves
Chop the onions and separate the layers.
Mix all of the remaining ingredients together and then stir in the raw onions.
Allow to marinate for an hour or so, in the fridge, before serving.

Plain onion salad (Kachumber) 
  • 2 medium white onions, quartered and sliced finely
  • 2.5 cm/1" chunk of cucumber, de-seeded, quartered and sliced finely
  • 1 tomato, de-seeded, quartered and sliced finely
  • ½ tsp dried mint
  • 2 tsp chopped fresh or frozen coriander leaves
  • 2 tsp lemon juice
  • A little red chilli powder, to taste (optional)
Chop the onions and separate the layers.
Mix with all of the remaining ingredients.
Allow to marinate for an hour or so, in the fridge, before serving.

Mint sauce

This is my version of the thin, pourable mint sauce (not the thicker raita), which is normally green and served with poppadoms and onion bhajis. If you want to, you can add a few drops of green food colouring, or a pinch of turmeric to give it some colour, but I don't think it needs it! 
  • 1 cup of plain yogurt or dairy-free yogurt
  • 1 small clove of garlic, crushed
  • 1 tsp caster sugar
  • 1 tsp unsweetened mint sauce concentrate (Colemans)
  • A few dashes of hot chilli sauce
  • 1 tsp chopped fresh or frozen coriander leaves (optional)
Mix all of the ingredients together. Chill until needed.

Top tip: If you can't find mint sauce concentrate, either use ½ tsp of dried mint or 2-3 tsp regular mint sauce, strained through a tea strainer to remove most of the vinegar. Adjust the amount of extra sugar added accordingly.

How to cook poppadoms in the microwave...

Traditionally poppadoms are deep fried in oil, but they taste nearly as good when cooked in the microwave and are much lower in fat. Look in the Asian section of your supermarket for brands of uncooked poppadoms, such as Ruby or Natco, as they are much cheaper and better than the big UK brands. 

 No Croutons RequiredYou can microwave them dry, for a fat-free snack, but they taste better and expand more, when wiped (use a sheet of kitchen towel) or sprayed on both sides with a little vegetable oil before cooking.

West Midland's BloggersMicrowave individually for 30-40 seconds on high (no need to turn).

For a main course try my paneer tikka kebabs with mushroom biryani.

I'm adding these salad recipes to this month's No Croutons Required challenge hosted by Jacqueline at Tinned Tomatoes and to the West Midland's Bloggers linky.
Pin It

Sunday, 12 October 2014

Peanut & Tamarind Falafels for National Curry Week

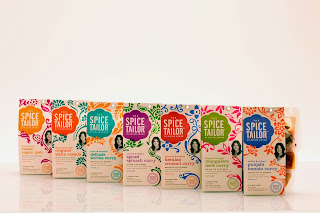
 The Spice Tailor sauce range
 The Spice Tailor chutni rangeAs you may have realised, my family all love Indian food. So we were excited to find out that Anjum Anand's The Spice Tailor range has now been extended to include a delicious array of curry sauces plus a tasty selection of chutnis. I've been testing out the whole range on my family over the past couple of weeks and they've been really impressed how tasty and authentic the sauces are. I've also loved how quick and easy they are to use.

I've been experimenting with different variations of falafels lately and decided to come up with an Indian-inspired version for National Curry Week, using The Spice Tailor products. I used two varieties from the new chutni range, which are a delicious addition to almost any Asian meal, either as a condiment or as an ingredient.

Makes 12
  • 1 tin of chickpeas, drained
  • 5 tbsp Spice Tailor peanut & tamarind chutni
  • 1 large clove of garlic, crushed
  • 1-2 tsp chilli paste/ hot chilli sauce
  • 1-2 slices of wholemeal bread, made into breadcrumbs
Peanut & Tamarind Falafels

Put all of the ingredients, except the breadcrumbs, into a food processor and blend for a minute or so. Scrape the ingredients down from the sides of the bowl and repeat until you have a fairly smooth mixture.
Add just enough breadcrumbs to form a fairly stiff, but not dry, mixture.
Roll into 12 balls and flatten slightly.
Chill in the fridge for around half an hour.

Heat 2 tbsp of vegetable oil in a large frying pan, on a medium heat.
Cook the falafels for around 4-5 minutes on each side until lightly browned.

Wrap in a chapatti with salad and your favourite dip, sauce or chutney; I served mine with onion salad and mint sauce:

Onion salad
  • 1 tsp Spice Tailor mint leaf chutni
  • 1 small onion, halved and very finely sliced
  • 1" cucumber, halved, deseeded and finely sliced
Indian mint sauce
  • 1 tbsp Spice Tailor mint leaf chutni
  • ½ cup natural or vegan plain yogurt
  • a pinch of sugar, optional
The Spice Tailor range is available from most major UK supermarkets and online.
I received a selection of complimentary products from The Spice Tailor to review and to use in recipe development. All views expressed are my own and those of my family.
Pin It

Thursday, 14 August 2014

The Hundred Foot Journey - A Book Review and Giveaway

 The Hundred Foot Journey
After reviewing several cook books with narrative content, I was intrigued by the offer of a review copy of The Hundred Foot Journey, which is classed as Foodie Fiction  - a genre new to me. 
Written by Richard C. Morais, The Hundred-Foot Journey has recently been made into a film starring Helen Mirren . The film will be released in the US on 8th August and in the UK on 12th September. It tells the story of a culinary war between a boisterous Indian family who open a restaurant in a sleepy French village opposite a renowned Michelin-starred chef. 
The book tells the life story of Hassan, a budding young Indian chef whose career takes off in a very different direction to the one his family have planned for him, after they move first to England and then to France. There are touching and sometimes tragic scenes, as well as many humorous moments, as Hassan gains recognition for his culinary skills, much to (acclaimed French chef) Mme Mallory's disdain. It is Hassan's journey though, both physical and emotional, which grips the reader and shocks his family. 

Detailed descriptions of the Hassan's ingredients, menus and culinary skills are paramount to the story, however, I must point out (as a vegetarian) that this is not a book for the squeamish, as there are also passages depicting animal slaughter and butchery. I personally would have liked slightly more detail about Hassan's family, culture and the Maison Mumbai restaurant and slightly less about French haute cuisine, but maybe that's just me!

Having read the book, I can't wait to see the film, as I can imagine that Helen Mirren will play the formidable Mme Mallory very well.

Watch the film trailer here...


I have two copies of the book to giveaway (UK only). Just enter on the Rafflecopter widget below and leave me a comment to tell me which you favourite type of cuisine is. Competition ends midnight 24th August '14.
a Rafflecopter giveaway

Integrity Statement
I received one copy of the book to review and 2 copies to giveaway.  The views expressed are genuinely those of myself and my family.

Pin It

Friday, 23 May 2014

Chana Korma - Mild Chickpea Curry (Vegan)

Chana Korma (mild chickpea curry)
It's a little late, but here's my post for National Vegetarian Week:

I often add chickpeas (chana) to my veggie curries or make a chana masala side dish, but I don't generally use them in a main dish curry. This korma recipe is tasty and filling enough to eat as a main dish, but can also be served as a side dish along with a paneer or vegetable curry. 

Don't be put off by the long list of spices...you can always use a ready-made curry paste to save time.

Serves 4 as a main course; 6-8 as a side dish
  • 1 tbsp vegetable oil
  • ½ cinnamon stick, broken.
  • ½ tsp fennel seeds, ground
  • 1 large onion, grated or finely chopped
  • 2 tsp grated fresh ginger
  • 2 cloves of garlic, chopped or crushed
  • 2-3 tbsp tomato puree
  • 1 tsp chopped chilli (optional - leave out for a very mild, child-friendly curry)
  • 1 tsp ground coriander
  • 2 or 3 curry leaves (optional)
  • ¼ tsp turmeric
  • 2 tins chana/chickpeas (I use the East End or KTC brands)
  • 1 cup/250ml of coconut cream or 2oz/50g creamed coconut (block) mixed with 1 cup/250ml boiling water
  • ½-1 tsp sugar (optional)
  • 1 tsp garam or korma masala
  • 1 tbsp coriander leaves, chopped
Heat  the oil in a large pan; and add the cinnamon and ground fennel seeds. Cook for a minute or so before adding the onion. Cook the onion on a medium heat until just starting to brown.
Add the garlic and ginger and cook for 2 minutes.
Mix in the remaining spices (except the garam/korma masala) and tomato puree and cook for 2-3 mins.
Add the chickpeas, coconut cream and sugar, simmer for 10 minutes with the lid on, adding a drop more water if needed.
Stir in the garam or korma masala and simmer for a further 2 minutes.
To serve, garnish with the chopped coriander leaves.

Serve with rice/naan/chapatti for a cheap and filling meal.

Alternatives: If you don't have a good range of dried spices, simply omit the tomato puree and dried spices and replace them with korma curry paste. 
Add some fresh or frozen spinach, or sliced mushrooms along with the chickpeas.

Pin It

Wednesday, 2 April 2014

Aloo Tikki

Aloo tikki are small, spicy potato and pea croquettes.These traditional Indian snacks are delicious eaten hot or cold with chutneys or mint sauce and also make a great an addition to an Indian buffet. They're really cheap to make and are vegan too. I added sweet potato to mine, to ring the changes.

Makes 12/Serves 4
  • 2-3 medium potatoes, peeled and cut into chunks
  • 1 medium sweet potato, peeled and cut into chunks
  • 1 small onion, grated
  • 1 large clove of garlic, crushed
  • 1 heaped tsp freshly grated ginger
  • ½ tsp cumin seeds
  • 1 tsp garam masala or chaat masala
  • 1 tsp finely chopped fresh chilli
  • ½ tsp turmeric
  • a handful of frozen petit pois or peas
  • 1 tbsp chopped coriander leaves
  • 1 slice of wholemeal bread, made into breadcrumbs
  • a few slices of (ready-made) melba toast crushed into breadcrumbs (or fine/panko breadcrumbs)
  • vegetable oil
Boil the potatoes for around 15 minutes, until soft. Drain and mash.
Meanwhile heat 1 tbsp vegetable oil in a pan on a medium heat. Add the cumin seeds and fry for minute. 
Add the onion, ginger, garlic and the rest of the spices and cook for a further 3-4 minutes.
Mix in the mashed potatoes, petit pois and chopped coriander, plus enough fresh breadcrumbs to bind and make a dough-like consistency.
Shape into slightly flattened balls using your hands and roll in the dried breadcrumbs. 
Leave in the fridge for 10 minutes or so, to firm up.

Heat a further tbsp of oil in a large frying pan. 
Fry the aloo tikki for 5 minutes on each side, until golden brown.
Keep warm in the oven and repeat until all of the croquettes have been cooked.

Serve with salad, chutneys or mint sauce.

Suitable for freezing (before or after frying).

Alternatives: Make large, flat tikkis and serve them in buns like veggie burgers.
Bake on a greased baking tray (in a hot oven) for a low-fat version.

Pin It

Friday, 17 January 2014

Mushroom Biryani

mushroom biryani
One of my favourite Indian take-away dishes is Mushroom Biryani, but it's not a recipe I've ever cooked before. As part of my Veganuary challenge, I've been broadening out my vegan repertoire, so I thought I'd have a go at this classic Indian rice dish.

As none of my extensive collection of recipe books contained an authentic recipe, I started browsing Indian blogs and came across this recipe from Prathibha who has a vegetarian blog called The Chef and Her Kitchen; Her biryani looked just the sort of thing I was looking for. Although I didn't quite have all the ingredients needed, I decided to try the recipe out, simplifying the cooking method slightly to speed up the preparation time.

The list of ingredients might look a bit daunting, but the resulting taste is worth it (the whole family agreed that it was as good as our normal take-away biryani!). If you don't have a wide selection of spices, improvise with what you do have, or simply swap the ground and whole spices for 1-2 tbsp of a good quality Indian curry paste (preferably one containing fennel and cardamom), it might not taste quite as good, but should be a pretty close alternative. 
Providing you do have a good selection of spices or already have a suitable curry paste, this meal costs under £2.00 to make.

serves 4-6
  • 1 cup of basmati rice soaked for 10 mins then washed till water runs clear and drained in a sieve
  • 1 large onion, cut in half and finely sliced
  • 100-150 g/4-6 oz chestnut mushrooms, washed and sliced
  • 2 tsp grated fresh ginger plus 2 cloves of crushed garlic or 1 tbsp garlic/ginger paste
  • 1-2 tsp finely chopped chilli
  • 1 tsp ground coriander
  • ½ tsp turmeric
  • 1 bay leaf
  • 2 whole green cardamom pods
  • 1 small stick of cinnamon
  • 1 whole star anise
  • ½ tsp cumin seeds, whole
  • ½ tsp fennel seeds, ground
  • salt  and black pepper to taste
  • 2 tbsp vegetable oil
While the rice is soaking/draining, heat 1 tbsp oil in a large frying pan, add the onions and fry until golden brown.
Remove the onions from the pan and keep to one side.
Heat a further 1 tbsp oil in the pan and add the garlic, ginger, chilli and spices cook for 2 minutes.
Add the mushrooms  and cook until the mushrooms begin to brown.
Add the drained rice and half of the cooked onions, and stir to coat in the spice mixture.
Add 1 ¾ cup boiling water. Stir well.

Cover with a lid and cook for 12 minutes, or until the rice is almost cooked and the water has been absorbed.
Turn the heat off, and leave the pan on the warm hob with the lid on. 
Allow the rice to stand for a further 15 minutes.
Fluff with a fork (discarding the whole spices if you can find them!) and top with the reserved fried onions.
 Bookmarked Recipes
Either serve with tarka dal / chana masala or add a drained tin of chickpeas to the rice (just before it's cooked), for a protein-rich complete meal.

I'm adding this recipe to January's Bookmarked Recipes over at Tinned Tomatoes and to this month's Credit Crunch Munch which is co-hosted by Fab Food 4 All and Fuss Free Flavours.

Pin It

Sunday, 27 October 2013

Paneer Jalfrezi

paneer jalfrezi
©
Diwali is around the corner, so I thought I'd cook up something suitably spicy.  Apparently, the jalfrezi has overtaken the tikka masala as Britain's favourite curry, so here's my vegetarian version, made with paneer cheese.

Serves 4 as a side dish
  • 200g/8oz paneer, cut into chunks
  • 1 medium onion, halved and thinly sliced
  • 2 tsp grated fresh ginger plus 2 cloves of crushed garlic (or 1 tbsp garlic and ginger paste)
  • ½ teaspoon turmeric
  • 2 tsp ground cumin
  • 2 tsp coriander powder
  • 2 bell peppers, deseeded and cut into chunks or strips
  • 2-3 fresh chillies; 1 chopped finely and 1-2 sliced lengthwise
  • ½ tin/1 cup chopped tomatoes
  • ½ teaspoon garam masala
  • 1 tbsp vegetable oil
Heat half of the oil in a large frying pan on a medium heat.
Add the paneer and cook for a couple of minutes on each side, until lightly browned.
Remove the cheese and drain on kitchen towel.
Add the rest of the oil to the pan, then add the onions and cook until golden brown. 
Stir in the garlic, ginger, chopped chilli, turmeric, cumin and coriander and cook for a few more minutes.
Throw in the peppers. 
Mix in the chopped tomatoes and sliced chilli.
Cover the pan and simmer for around 15 minutes, stirring occasionally, until the peppers have softened.
Finally add the paneer chunks and garam masala.
Simmer for a further 5 minutes before serving.

Serve with chapattis/rotis and vegetable pakoras.

Suitable for freezing.

Alternatives: If you don't like paneer, you could swap it for chicken-style, meat-free fillets, cut into chunks. Cook as above.
Vegan option: Omit the paneer and substitute with button mushrooms and/or tinned chickpeas. Add these along with the peppers.


Pin It

Friday, 17 May 2013

Paneer Tikka Kebabs

paneer tikka kebabs
These simple paneer tikka kebabs taste delicious cooked on the barbecue, but can be grilled or baked instead.
  • 200g/8oz paneer, cubed
  • 2 bell peppers, deseeded and cut into chunks
  • 1 large onion, peeled and cut into quarters 
For the marinade:
  • 2 tsp tandoori/tikka spice mix or paste
  • 1 large clove of garlic, crushed
  • 1 heaped tsp fresh ginger, grated
  • 1 tsp red chilli, deseeded and finely chopped
  • 1 tbsp vegetable oil
  • Zest and juice of 1 large lemon
For the mint sauce:
  • 1 cup of plain yogurt/dairy-free yogurt
  • 1 small clove of garlic, crushed
  • 1 tsp caster sugar
  • 1 tsp garden mint sauce concentrate (the type you add your own sugar and vinegar to)
  • A few dashes of chilli sauce
Mix all of the marinade ingredients together in a large bowl.
Add all of the kebab ingredients and coat well in the marinade.
Cover and leave to marinate in the fridge for an hour.
Soak wooden kebab skewers in water for a few minutes (to help prevent them from burning), and thread alternate chunks of paneer, onion and pepper onto the skewers.
Grill or bbq for around 10 minutes, turning occasionally.
Serve in a warm pitta or naan bread with salad and mint sauce. 

To make the mint sauce, simply mix all of the ingredients together, adding chilli sauce to taste.

Alternative: Use diced meat-free/Quorn 'chicken-style' fillets instead of paneer if preferred.
For an easy camping version, just swap the marinade ingredients, for a ready-made tikka paste.
Vegan version: Use whole button mushrooms or firm, pressed tofu instead of the paneer.

Pin It

Friday, 3 May 2013

Paneer Makhani

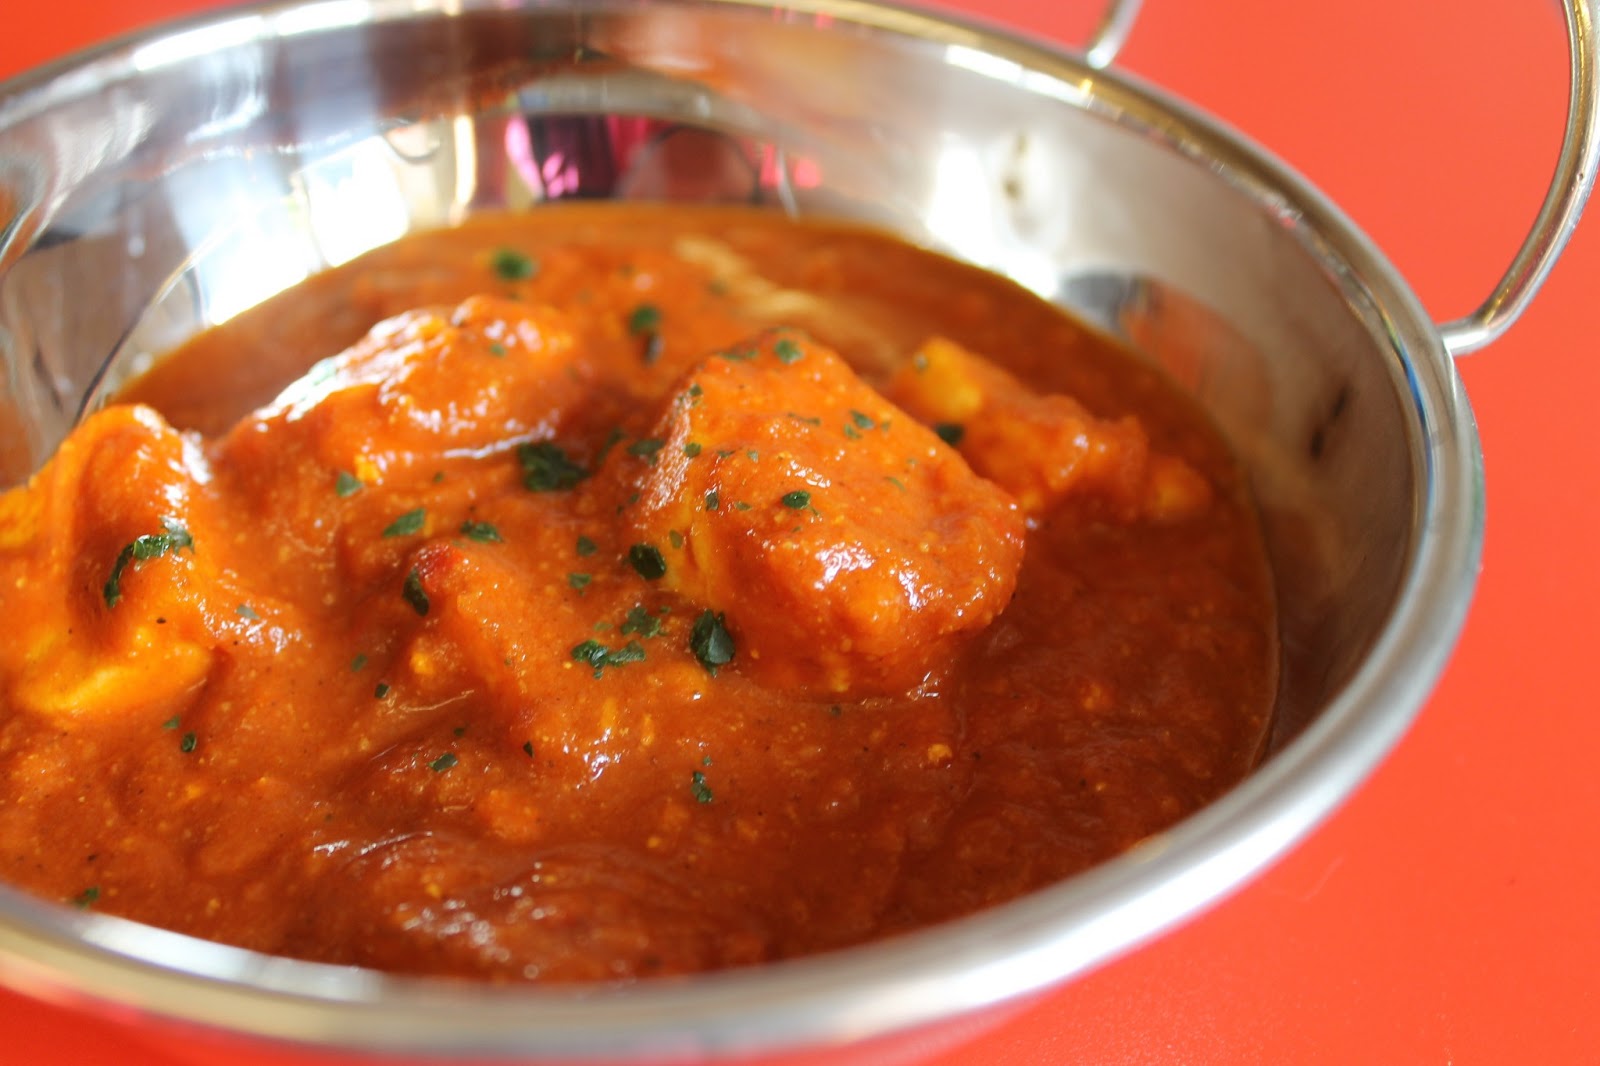
paneer makhani in a balti dish
©
This is my version of paneer makhani (butter paneer masala) which is one of my favourite Indian restaurant dishes. The recipe is adapted from this one on Archana's Kitchen blog, but I changed the amounts of spices used and altered the ingredients slightly. I'm sure this doesn't give quite the same flavour, but the resulting gravy tasted pretty good to me (and the rest of the family). I made this recipe using my own home-made paneer cheese.

Serves 4
  • 1 tbsp butter or vegetable oil
  • 1 onion, grated
  • 1 large clove of garlic, crushed
  • 2 heaped tsp grated ginger
  • 2 tsp garam masala
  • 2 tsp ground cumin
  • 2 tsp fenugreek leaves (kasoori methi) or 1 tsp ground fenugreek
  • ½ tsp turmeric
  • ¼ tsp ground cinnamon
  • ¼ tsp ground black pepper
  • 2 whole green cardamom pods
  • 1 chilli, deseeded and finely chopped (add more or less to taste)
  • 500 ml/1 pt passata
  • 2 tsp sugar (add more or less to taste)
  • 3 tbsp double cream or 25g/1oz grated creamed coconut, optional
  • 200g/8oz paneer, cubed and fried in 1 tbsp vegetable oil
Heat the butter/oil in a pan and add the onion, garlic and ginger.
Fry on a gentle heat until the onion just starts to colour.
Add the remaining spices and cook for a further minute.
Add the passata and sweeten to taste.
Simmer on a low heat for 30 minutes.
Meanwhile, fry the paneer cubes until golden brown, remove and blot on kitchen towel.
Add the paneer (or vegan alternative) to the sauce and simmer for a further 10 minutes before removing from the heat and stirring in the cream/creamed coconut, if using. 
Serve with rice, naan or chapatti.
Remember to remind everyone about the cardamom pods!

Alternatives: Use meat-free/Quorn 'chicken' pieces instead of paneer if preferred. Add to the sauce as above and simmer for 15 minutes.
For a mild, child-friendly curry, omit the chilli, remove the children's portions, checking for cardomon pods, and then add a little hot chilli sauce to the remaining adults' portions. 
For a vegan or lower-fat option, swap the paneer for pressed, firm tofu (fry as for paneer), or tinned chickpeas and sliced mushrooms (lightly cook the mushrooms and drain the juices before adding to the sauce).

Pin It

Sunday, 21 April 2013

How to make paneer cheese

After reading Christine's post on making ricotta cheese (Thinly Spread), I thought I'd have a go at making my own paneer. A friend of mine told me that she always makes her own paneer and that it's really simple, so I bought myself some muslin cloths (from the baby section in ASDA) and got cheese-making. Although a little time consuming, it really is pretty straight forward and would be a great activity to do with the kids.

This recipe makes around 200g/8oz of cheese, but you could easily double the recipe and freeze any left over cheese. Making in bulk will also save you money.
  • 1 litre/2 pt full-fat organic cow's milk (preferable un-homogenised)
  • 2 tbsp freshly squeezed lemon juice
Pour the milk into a large saucepan.
Bring to the boil (on a medium heat), stirring occasionally.
Remove from the heat (reduce the heat to low) and stir in the lemon juice.
Return to the heat and stir gently until the curds to separate.

If this works, you will see the watery whey separate from the white solid curds (see top right hand photo). If they don't separate initially, add some more lemon juice.

Remove from the heat.
Line a colander with a muslin cloth.
Pour the curds and whey into the cloth and allow to drain for a few minutes.
Then tie the muslin so that it is hanging from the kitchen tap and allow to drain for an hour.
After an hour, twist the cloth gently and squeeze out a little more whey (see bottom right hand photo).
Open the cloth carefully. Without moving the curds, gently place them on a plate and cover with the muslin (so they are sandwiched between the cloth).
Top with another plate and weigh down with a pan full of water. Press for a further two hours, draining off the whey if necessary.
Remove the pan and plate and unwrap the cheese. Finally, cut into cubes.

Refrigerate and use within two days, or freeze until needed.

Recipe adapted from Anjum Anand's Indian Food Made Easy.
Pin It

Sunday, 20 January 2013

Tarka Dal

bowl of tarka dal
©
This simple tarka dal/dhal recipe is really cheap to make and tastes great as a side dish. Double the recipe for a main meal.

Serves 4
  • ½ cup dried red lentils
  • 1 small onion, diced finely
  • ½ tsp cumin seeds/powder
  • ½ red chilli, de-seeded and chopped finely, optional 
  • ½ tsp turmeric
  • 2 heaped tsp grated fresh ginger
  • 2-4 cloves of garlic, crushed or finely sliced
  • 1 heaped tsp garam masala
  • Salt and black pepper to taste
  • 1 tbsp tomato purée
Place the lentils in a pan with 1½ cups boiling water. 
Bring to the boil and simmer for 20 minutes or until tender, adding a little more water if needed.

In another pan make the tarka by heating 1 tbsp vegetable oil. 
Fry the cumin and onion until golden.
Add the remaining ingredients (except the garam masala) and cook for 2-3 minutes on a low heat.

Add the cooked dal to the tarka and stir in the garam masala. Season to taste.
Cook on a low heat for a further 5 minutes, adding a little more water if needed.

Serve with rice/chapattis and a vegetable curry.

Alternatives: Try using different pulses or a combination of lentils and adjust the cooking time as necessary.

Pin It

Monday, 15 October 2012

The Spice Tailor curry sauces from Anjum Anand - a review


I'm ashamed to say that National Curry Week passed me by last week, without me hearing anything about it, so this week I'm making up for it by cooking three different vegetarian curries using three of the new curry sauces from The Spice Tailor. I regularly cook curries from scratch, so I was surprised to read that a recent survey by The Spice Tailor, found that despite tikka masala being Britain's favourite curry, only 25% of us have ever tried cooking it at home.

Celebrity chef Anjum Anand has develop her own range of sauces which makes cooking a curry at home, faster than ordering one from the take-away! There are seven sauces in the range, most of which come with a sachet of dried spices, a base sauce and a curry sauce. Recipe tips and suggestions for extra ingredients are included, but basically you fry the dried spices (with or without the optional dried chilli) in a drop of vegetable oil, then add your choice of paneer, pulses and/or vegetables (or meat/fish, if you're not vegetarian!), followed by the base sauce. After a couple of minutes, you add the curry sauce and leave to simmer for about 8 minutes.


©
I tried out three of the sauces: the Tikka Masala (which I added paneer and mushrooms to), the Punjabi Tomato (with added chickpeas and aubergine) and finally the Spiced Spinach (with added potatoes and green pepper). I pre-cooked all of the vegetables, except the mushrooms, before adding them to the curry sauces, as I knew that they wouldn't cook through in 8 minutes, however paneer, tinned pulses and meat substitutes such as Quorn would all work well and cook in the stated time if you were in a hurry. I added the whole chilli to all of my curries and fished it out before serving...we're all used to eating medium curries and I would say, even with the added chilli, all of the curries were on the milder side of medium. Some of the other whole spices needed removing before serving too, such as the whole cardamom pods and the curry leaf. You could, of course, leave them in and play 'find the spices' at the dinner table with the family!

Each of the curries looked and tasted very different from each other and the smell in my house was amazing! We all like the flavour of the Punjabi Tomato curry best, followed by the Tikka Masala. A word of warning though...the Tikka Masala didn't taste anything like a British restaurant tikka massala; it tasted strongly of cardamom and wasn't sweet and creamy. Not a criticism, as it tasted very aromatic, just not how I expected it to taste! The Spiced Spinach curry was our least favourite as it tasted a little bitter and the spinach flavour dominated the dish. I would have preferred to add fresh spinach instead. I found the sauces very simple to use, and good value for money. Although each sauce was supposed to serve two, I found that by adding extra vegetables and pulses, each one made a curry big enough to feed my family of four.
If you want more tips on cooking curries at home, tune in to Cookalong with Anjum on ‘Spice Nights’, when Anjum will be showing how to cook simple and delicious Indian dishes in just 15 minutes, using some cheats and lots of scratch cooking.  Spice Nights airs weekly on Tuesday evenings at 7.30 pm from now until 6th November. Register to watch at www.thespicetailor.com.

The Spice Tailor range is now available to buy online at www.thespicetailor.com and in Waitrose stores.

Integrity Statement
I received 3 Spice Tailor curry sauces to review and 3 to give away on my blog. I did not receive payment, and the views expressed are genuinely those of myself and my family. Pack images courtesy of The Spice Tailor.

Pin It

Friday, 9 March 2012

Veggie Mince Shami Kebabs

Veggie Mince Shami Kebabs
©
My mum used to make shami keema kebabs (in fact she may still make them, but she obviously doesn't make them when we are visiting!). I thought I'd have a go at making a vegetarian version using veggie mince and breadcrumbs to replace the meat, and I was pleased with the result. 

Serves 4-6

  • 200g/8oz vegetarian mince (I used Quorn) - defrosted if frozen
  • 2 cups fresh breadcrumbs (about 100g/4oz)
  • 2 medium eggs
  • 1 large onion finely chopped or grated
  • 1 large clove of garlic, crushed
  • 1 chilli, de-seeded and finely chopped/1 tsp chilli paste, optional
  • 3 tsp garam masala
  • 1 tsp whole cumin seeds
Heat 1 tbsp of vegetable oil in a pan.
Fry the spices with the onion and garlic on a low heat for a few minutes, until the onion is soft.
Remove from the heat.
Put all of the ingredients into the food processor and blend until combined.

Chill for 30 minutes to firm up.
Form into 8-12 small sausage or burger shapes, pressing the mixture together with your hands.
Shallow fry in a drop of oil until golden brown, or brush with oil and grill or bbq.

Serve with spicy pilau rice, or in bread rolls, chapattis or wraps...they taste great with a good dollup of tomato ketchup!


Alternatives:
Add 1-2 tbsp of your favourite curry paste instead of the spices/chilli if preferred.
For a Middle-Eastern version (Kabab Koobideh), swap the spices for some finely chopped parsley, ½ tsp cinnamon and ½tsp sumac. Rolls the mixture out into thinner, longer sausage shapes and cook as above.

I haven't tried making a vegan version yet, but you would need to swap the egg for something that would help bind the mixture together (maybe arrowroot?). If you find one that works, please let me know!


Not suitable for freezing.
Pin It

Friday, 11 November 2011

Aloo/Potato Masala Parathas (Vegan)

©
Miss Kahonie and I made our own parathas for this recipe, but it was a bit of a faff, so I'd suggest using ready-made ones (look in the frozen Asian foods section in larger supermarkets), or use chapattis or tortilla wraps instead.
If you want to made your own, I've added the recipe at the bottom of this page. 

Serves 4 (fills 4-8 parathas depending on size)
  • 1 large potato, peeled and diced
  • 1 sweet potato, peeled and diced
  • 1 medium onion, diced
  • 1 clove of garlic, crushed
  • ½ tsp cumin seeds
  • ½ tsp black mustard seeds
  • ½ tsp turmeric
  • 2 heaped tsp ground coriander
  • ½ fresh chilli grated, or finely chopped, optional
Boil the potatoes until soft (as you would for mash), then drain.
Fry the cumin and mustard seeds in 1 tbsp vegetable oil, for a minute or so, until they start to pop.
Then add the onion to the pan and cook until soft.
Add the garlic, chilli and remaining spices.
Add the potatoes and a drop of boiling water and stir.
Cook for a couple of minutes until piping hot.
Crush the potatoes lightly with a fork or potato masher (the mixture should still be quite lumpy).
Spoon into warm parathas/chapattis and serve. 

Alternatives: Add a handful of frozen peas or some chopped spinach to the pan along with the cooked potatoes.

Parathas
Makes 6-8
  • 100g/8oz plain flour
  • 2 tbsp vegetable oil
  • Warm water
  • Dairy-free spread/butter
Mix the flour and oil together (I used my food processor), then slowly add the water until the mixture just starts to form a dough.
Chill the dough for about 30-60 minutes.
Cut into 6-8 pieces and roll each into a rough circle, on a lightly floured board.
Spread each circle with a little spread/butter. Fold in half to make a semi-circle.
Spread with a little more spread/butter and fold over again to make a triangle.
Gather up the edges of the dough and make a ball.
Roll this out to make a circle again (about 10-15cm across) .
Heat a frying pan (with no oil).
Cook each paratha for a minute or two on each side.
Keep them warm in the oven until they are all cooked. 

Pin It

LinkWithin

Related Posts Plugin for WordPress, Blogger...