Showing posts with label chocolate. Show all posts

Saturday, 17 February 2018

The Best Millionaire's Shortbread, Ever!

This delicious and indulgent recipe for millionaire's shortbread is one my grandma used to make, so it's been tried and tested over three generations and is still a family favourite. It takes a while to make, but it's definitely worth it for a special occasion or gift.
For the shortbread base
  • 200g/8oz block butter
  • 200g/8 oz caster sugar
  • 300g/12 oz SR flour
  • 3-5 tbsp. milk
For the caramel
  • 200g/8oz butter
  • 200g/8oz soft brown sugar
  • 2 tbsp. golden syrup
  • 2 x 400g/1lb tins of condensed milk
  • a good pinch of sea salt
To top
  • 300g milk chocolate
  • 50g white chocolate (optional)
Grease and line a non-stick baking tray.
Pre-heat the oven to 170C/160C Fan/325F/Gas 3

Using a food processor, rub the butter into the flour and sugar, until you have the consistency of fine breadcrumbs. Slowly, add a little milk at a time, until the dough just comes together into a ball.

Press firmly into the baking tray, using the back or a fork or spoon.

Bake for around 30 minutes or until golden brown and firm to the touch. Remove from the oven and allow to cool in the tray.

Meanwhile, make the caramel...

Melt the butter, sugar and syrup together over a low heat, until the sugar has dissolved.
Add the condensed milk and salt. Slowly, bring up to a simmer, stirring slowly but regularly with a wooden spoon, so that the caramel doesn't burn on the bottom of the pan.
Continue to simmer for around 10-15 minutes, until the caramel has turned a deep golden brown and has thickened. You may get little, dark bits of caramel floating around, but this doesn't affect the flavour!

Pour the hot caramel over the shortbread base, smooth out and allow to cool.

When the caramel is cool, melt the chocolate and pour over. Spread gently with a palette knife or the back of a spoon.

Finally drizzle with melted, white chocolate and feather using a skewer or toothpick, if liked.

When almost set, cut into pieces, using a sharp knife.
Allow to cool completely before removing from the tin.

Makes 20 large or 40 small pieces.
Will keep in an airtight container for several days. Pin It

Wednesday, 5 April 2017

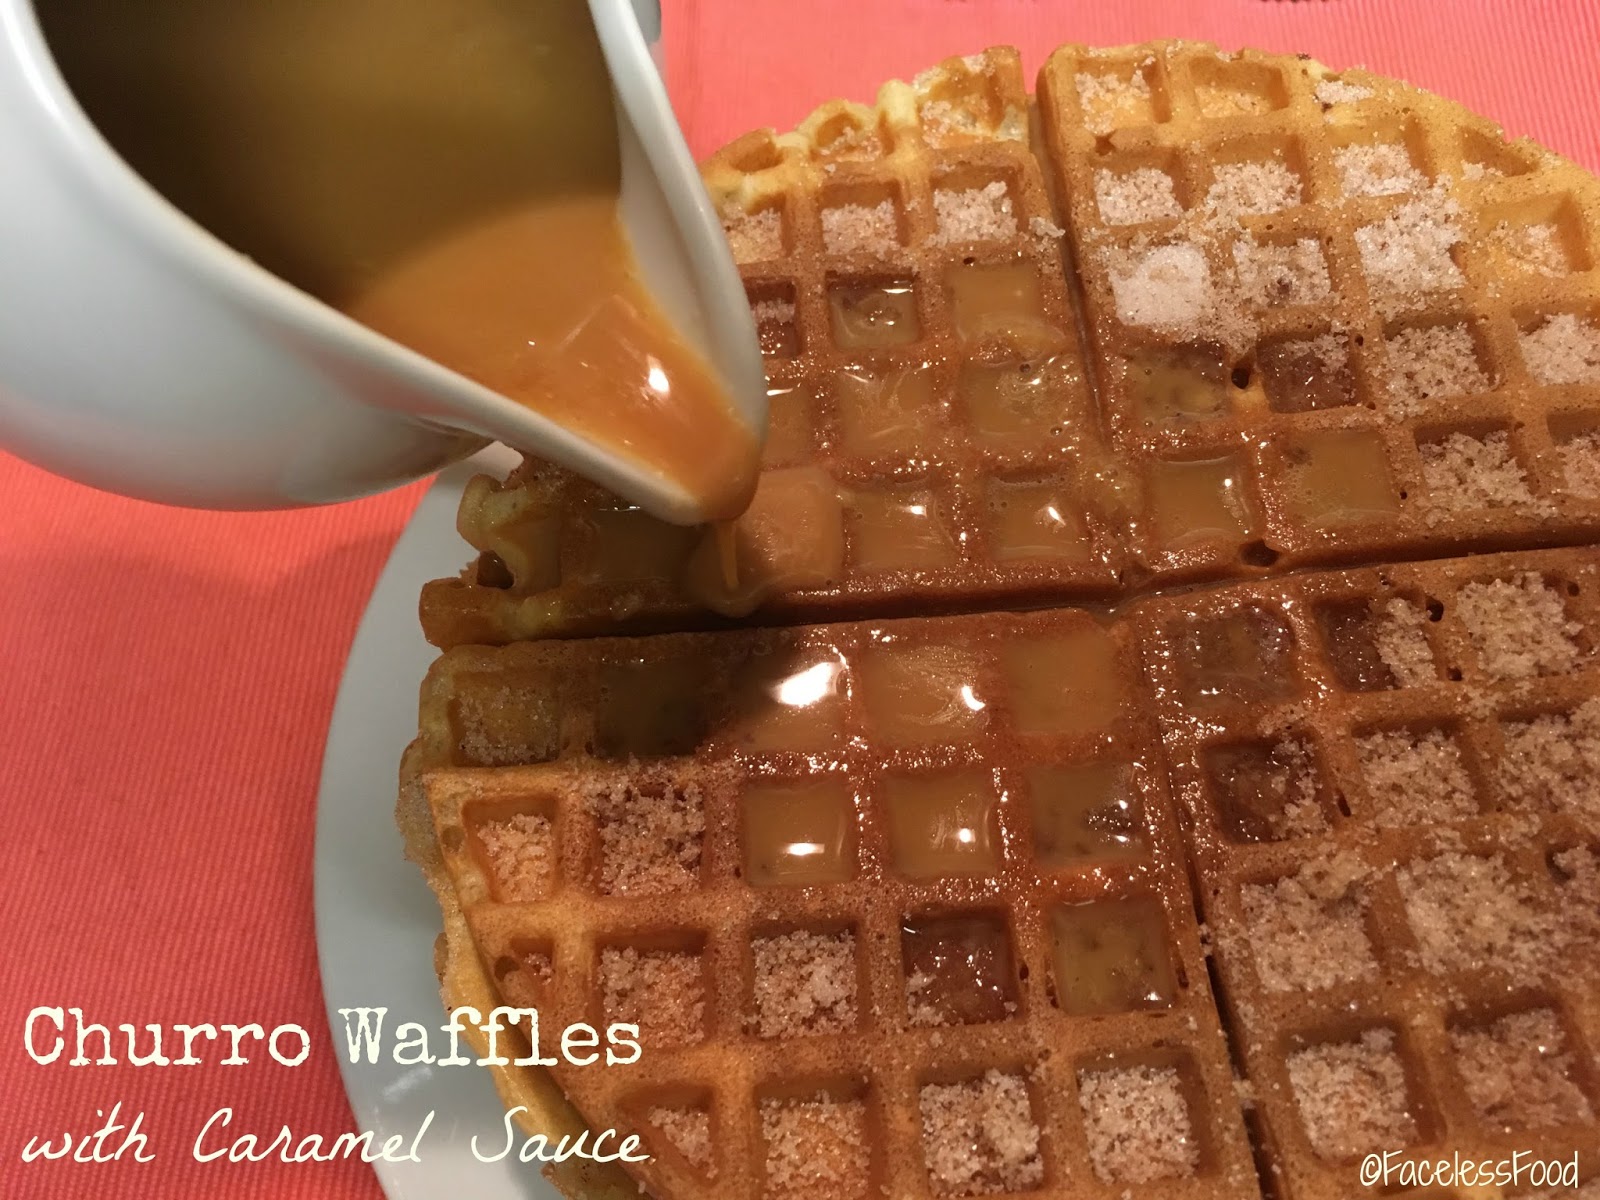
Churro Waffles with Caramel Sauce

Churro Waffles with Caramel Sauce
These churro-style waffles are cooked in a waffle maker rather than being deep fried like traditional churros. I made mine in my trusty Sage Waffle Maker, however there are cheaper gadgets on the market. You could cook these like drop scones on a large non-stick frying pan, if you don't have a waffle maker.

Makes 4-5 large waffles
  • 2 eggs
  • 2 cups SR flour
  • 1⅓ cups milk  
  • ⅓ cup soft brown sugar                   
  • ⅓ cup butter, melted
  • 1 tsp vanilla extract
  • a pinch of bicarbonate of soda/baking soda
  • a pinch of cinnamon
For the cinnamon sugar, mix ingredients together.
  • ½ cup caster sugar
  • 2 tsp cinnamon
For the caramel dipping sauce, heat ingredients together in a pan or in the microwave and stir thoroughly.
  • 1 cup dulche de leche/caramel condensed milk
  • 1 cup evaporated milk or double cream
Beat all of the waffle ingredients together to make a smooth, thick batter.
Heat your waffle maker or frying pan on a medium-high heat.
Cook waffles until golden brown.

Whilst warm, dust on both sides with the cinnamon sugar.

Serve drizzled with the hot caramel sauce.

Top tip: Make a chocolate sauce by melting chocolate and mixing with double cream or evaporated milk. Heat gently until you have a smooth, warm sauce.
Pin It

Tuesday, 19 May 2015

National Vegetarian Week 2015 - Win Seed & Bean Chocolate


 National Vegetarian Week
Happy National Vegetarian Week! Whether you're vegetarian, vegan or just veg-curious, Vegetarian Week is a great time to try out new foods and test out some mouth-watering, meat-free recipes on the family. Being vegetarian these days doesn't mean living on lentils, even though some people still have these out-dated misconceptions.

When I went fully veggie over 20 years ago, meat-free convenience foods were in their infancy and you had to go to a health-food store to buy them. Dried TVP mince and Sos-Mix were a couple of the limited range of products available; there were no ready-made veggie sausages, burgers or Quorn products available in supermarkets (that makes me sound old!).

These days, there's a great range of fresh and frozen veggie/vegan-friendly products available, and a wealth of cook books, blogs and apps to inspire you to cook an exotic range of cuisines. I've been particularly encouraged to see so many new young, vegetarian and vegan food bloggers in the (social)media lately. After a lull in vegetarianism, and a rise in the interest and popularity of so called ethically-raised meat, it seems that being vegetarian/vegan is becoming fashionable again.

I hope you'll take a look at some of my recipes and those on the Vegetarian Society website and recipe app and maybe share them with your friends and families, to show them that vegetarian food doesn't need lots of weird fancy ingredients to make it taste good!

To celebrate the week, and to keep in with the share theme, I'm sharing some delicious organic and award-winning Seed and Bean Chocolate with you, by hosting a give-away.
 Seed & Bean
This year Vegetarian Week is all about sharing delicious vegetarian food with friends, family and colleagues, exploring all the amazing tasty offerings that can be enjoyed. 
At Seed and Bean we believe in courageous chocolate. Creating, exciting, vibrant flavours, with no ‘hints of’ or ‘flavourings’. If we can’t use real, we don't make it. Bars include Chile, Lime, Coffee, Coconut, Cornish Sea Salt, Raspberry, Cardamom, Poppy Seed, Hemp and are available in either milk, white or dark, with 12 being suitable for vegans. 
Some flavour combinations are smooth and easy on the palette, some will rocket your taste buds - but whatever takes your fancy we can promise that Seed and Bean will change your chocolate life forever.
I tried out three of their dark, dairy-free varieties including pumpkin seed and hemp oil, hazelnut, and sea salt. Some of the flavour combinations might sound a bit adventurous, but you won't be disappointed. The dark chocolate is amazingly smooth and rich, and contrasts well the the additional flavourings. With distinctive recyclable, matt packaging in a rainbow of colours, the bars are easy to spot in-store; Seed and Bean chocolate is stocked in Waitrose, Planet Organics, Whole Food Markets, and on line at www.seedandbean.co.uk with a RRP £2.49 for an 85g bar.

To win 4 bars of Seed and Bean chocolate, just enter the Rafflecopter widget below, and leave me a comment telling me which bar you'd most like to try. Please also mark your entry 'vegan' if you wish to win dairy-free chocolate only. Competition ends midnight Wednesday 27 May 2015. UK ONLY

Integrity Statement
I received a selection of complimentary chocolate bars from Seed & Bean to review and give-away. I was not required to, or paid to promote the Vegetarian Week. All views expressed are my own.

a Rafflecopter giveaway Pin It

Thursday, 2 April 2015

Super-Cute Vegan Chocolate Cupcakes for Easter

These cute mint chocolate Easter cupcakes are a variation on my easy vegan fairy cake recipe and are topped with chocolate-coated cereal nests! 

I couldn't find any vegan mini-eggs, so I painted some mint imperials with dots of brown food colouring. Just be sure to warn guests that the eggs are hard sweets, in case they try and bite into them or give them to young children!

Makes 12

  • 150g/6oz dairy free spread/margarine
  • 150g/6oz sugar
  • 150g/5oz SR flour
  • 25g/1oz sifted unsweetened cocoa powder
  • 3 heaped tsp Orgran No Egg mixed with 7 tbsp water (or use a similar egg-substitute)
  • ½ tsp xanthan gum
Cream the spread and sugar together until light and fluffy.
Add the remaining ingredients and mix gently until combined.
Spoon the mixture between 12 paper cake cakes in a muffin tin, filling quite generously.
Bake at 180C/170C Fan/350F/Gas Mark 4 for around 20 minutes, or until firm to the touch.
Cool on a wire rack.

When cold, top with mint butter cream/frosting...

Vegan butter icing

  • 50g/2oz dairy free spread/margarine
  • 125g/5oz icing sugar
  • ½-1 tsp peppermint extract 
  • green food colouring
  • 1-2 tsp boiled water
Soften the spread.
Mix in the mint extract and colouring.
Beat in the icing sugar gradually, adding a little boiled water as needed to make a soft, spreadable mixture.

Pipe onto the top of each cupcake, once cold.

For the nests
100g/4oz dairy-free chocolate, melted
40g/1½oz rice crispies
12 vegan mint imperials (check ingredients for gelatine) or dairy-free chocolate mini eggs.
12 mini Easter chicks

Mix the cereal into the melted chocolate until coated. Spoon into a well greased mini muffin pan.
Press the crispies down with the back of a teaspoon and make a slight indent for the egg and chick to sit in. Chill until needed. 
Carefully remove the nests from the tin, using a palette knife, and place one on top of each iced cake.
Fill with a chick and an egg.

Top tip: Warning - do not open the oven to check until at least 15 minutes have passed (unless you can smell them burning!), as the egg-replacer takes longer to set than eggs would. I found this out whilst cooking my first batch and they sunk in the middle!

Alternatives: Make a large chocolate sandwich cake by dividing the mixture between two greased and lined sandwich cake tins and baking for 25-30 minutes. 
Pin It

Saturday, 1 November 2014

Chocolate Hazelnut Truffles (Vegan) - Suma Blogger's Network

Chocolate Hazelnut Truffles (Vegan)
I know it's a bit early, and you probably don't want reminding that Christmas is only 53 days away, but as it's the 1st of November, I thought I would start blogging some festive recipes! These vegan chocolate truffles are really easy to make, will keep in the fridge for a week or so, and make great home-made Christmas presents. 

This recipe makes Nutella or Ferrero Rocher flavoured truffles, which are totally dairy-free!

Makes around 10-12 truffles.
  • 200g/8oz dairy-free dark chocolate (I used Plamil chocolate drops)
  • 90ml/6 tbsp Ecomil almond cream (use 75ml/5 tbsp of cream if using liqueur as the flavouring)
  • 90ml/6tbsp Meridan crunchy hazelnut butter 
  • 1 tsp vanilla or other flavouring extract
  • Unsweetened cocoa powder, desiccated coconut, coconut sugar, roasted chopped hazel nuts, grated chocolate etc. to coat.
  • 2-4 tsp date/agave syrup to sweeten (optional)*
Heat the chocolate in a heat-proof bowl, in the microwave, until melted - Stir every 10-15 seconds, to make sure it doesn't burn.
Add the almond cream, vanilla and nut butter and mix well - Taste and sweeten* at this point if you prefer a sweeter truffle.

Chill the mixture for an hour or two, until firm.

Remove from the fridge and working quickly, shape heaped teaspoonfuls of the mixture into balls, using your hands.
Roll the truffles in your preferred coatings and pop into sweet cases. Refrigerate until needed.
Wrap in cellophane bags to give as presents.

*These truffles have quite an adult dark-chocolate taste, so may not appeal to younger children. For a more child-friendly option, use a dairy-free 'milk chocolate' and sweeten the mixture with 2-4 tsp date/agave syrup.

Flavour options: Vary the recipe by using different nut butters and flavourings; use 1 tbsp liqueur, 1 tsp flavouring extract or a little grated lemon/orange zest instead of vanilla extract. Try using almond or cashew nut butter instead of hazelnut.


As a member of the Suma Blogger's Network, I will receive a selection of complimentary products from Suma every two months, to use in recipe development, and will blog an original recipe for the Network. 


Pin It

Thursday, 12 June 2014

Triple Chocolate Vegan Cookies - Suma Blogger's Network

triple chocolate vegan cookies
This is my first post for the brand new Suma Blogger’s Network, which I'm very proud to be part of.The Network is made up of a collection of vegetarian and vegan bloggers from all over the UK, who will be blogging every couple of months using ingredients from Suma Co-op (wholesale suppliers of a huge range of vegetarian and vegan foods)

Each recipe will be featured both on the individuals' blogs and on the Suma website.

My first recipe is a slightly indulgent one, but one which will hopefully dispel the myth that vegetarians and vegans live on lentils and spinach! 

Makes 10-12 cookies
  • 4oz/1400g plain flour
  • 2 tbsp unsweetened cocoa powder, sieved 
  • ½ tsp bicarbonate of soda
  • a pinch of salt
  • 3oz/75g dairy-free margarine/spread
  • 6oz/150g soft, brown sugar
  • 2 tbsp golden syrup
  • 1 tsp vanilla extract
  • 1 tsp No-Egg (egg replacer) mixed with 1 tbsp water
  • 2oz/50g white, dairy-free chocolate/chocolate chips (I used Organica vegan white chocolate from Suma)
  • 2oz/50g 'milk', dairy-free chocolate/chocolate chips (I used Moo-Free from Suma)
  • 2oz/50g dark, dairy-free chocolate/chocolate chips (I used Plamil chocolate chips from Suma)
a selection of products from Suma
Pre-heat the oven to 170C/160C Fan/325 F/Gas 3 and grease two baking sheets.

Melt the spread on a low heat and allow to cool.
Cream the spread with the syrup and sugar.

Add the remaining dry ingredients (except the chocolate), the egg-replacer and the vanilla
Mix until you have a fairly firm, smooth dough; if the dough is too crumbly, add a little water or dairy-free milk.
Add the chocolate pieces and mix again to distribute them evenly through the dough.

Take dessert-spoonfuls of the mixture and place them, spaced well apart on the baking sheets.
Do not flatten.
Bake for 10-12 minutes.
Remove from the oven and allow to cool for around 5 minutes before removing and placing on a wire rack to cool.

 Suma Blogger's Network
Will keep for several days in an airtight container. Suitable for freezing. 

Alternatives: Make chocolate-orange or mint-chocolate cookies, by swapping the vanilla extract for orange or mint.

Integrity Statement
As a member of the Suma Blogger's Network, I will receive a selection of complimentary products from Suma every two months, to use in recipe development, and will blog an original recipe for the Network. 


Pin It

Thursday, 24 April 2014

Chocolate Viennese Biscuits (Vegan)

These crisp and crumbly, little chocolate biscuits are super-easy to make, so a great way to get even very young kids involved with baking. The raw cookie dough tastes pretty good too! They disappear pretty quickly in my house, so you might want to double the ingredients to make a larger batch and freeze half.

Makes 16
  • 4oz/100g dairy free spread
  • 2oz/50g caster sugar
  • 4oz/100g plain flour
  • 1oz/25g cornflour
  • 1oz/25g unsweetened cocoa powder, sifted
  • 1 tsp vanilla extract
Preheat the oven to 180C/170C Fan/350F/Gas 4.

Cream the butter and sugar.
Add all of the remaining ingredients and mix together until you have a stiff dough.
Tip the dough onto a piece of cling film and squish into a rough sausage shape (around 16 cm long)...it will not look very appealing at this point!
Roll the cling film around the 'sausage' and pop into the freezer for around 10 minutes, to firm up (you don't want to actually freeze it, so don't leave it for much longer).
Unwrap the 'sausage' and slice into around 16 slices of 1cm thickness.
Place on a greased baking sheet, spaced a few cm apart.
Bake for 15-18 minutes, or until firm to the touch and slightly darker in colour.
Remove from the tray and cool on a wire rack.

Alternative: Once cool, melt around 50g/2oz of dairy-free chocolate (or left over Easter egg!). Dip each biscuit into the melted chocolate. Place on grease-proof paper to set.

Suitable for freezing.

Pin It

Sunday, 9 February 2014

Valentine's Ice-Cream Cookie Sandwich

Valentine's Ice-Cream Cookie Sandwich
Here's a simple Valentine's dessert which can be made in advance and assembled on the day. Although I used dairy ice-cream in this recipe, the cookies and accompaniments are vegan and can easily be served with a dairy-free ice-cream alternative (I can recommend Booja Booja).

Left over cookies can be sandwiched with softened ice-cream, wrapped in foil and frozen until needed.

For the shortbread cookies
  • 4oz/100g dairy-free spread, softened
  • 4oz/100g caster sugar
  • 8oz/200g plain flour
  • 1oz/25g unsweetened cocoa powder, sieved
  • 1 tsp vanilla extract
Cream the spread and sugar. 
Mix in the remaining ingredients, to make a firm dough.
Add a little drop of cold water or some extra flour if needed.
Chill for 30 minutes.

Roll out the chilled dough between 2 sheets of grease-proof paper, until it is about ½ cm thick.
Using a heart cookie cutter, cut out as many shapes as you can from the dough.
Either leave whole, or slice vertically with a sharp knife to make half hearts.
Carefully remove the dough cut-outs from the paper and place on a greased baking sheet (leaving a small gap between each cookie).
Reserve the scraps and re-roll. 
Repeat until all the dough has been used up.
Prick each cookie with a fork.

Bake at 180C/170C Fan/Gas 4/350F for 8-12 minutes (depending on the size of the cookie, and whether you prefer a soft or crunchy cookie).
Cool for a few minutes on the tray before removing and cooling on a wire rack.

Once cooled, sandwich with softened ice-cream/vegan ice-cream. 

Suitable for freezing.

Eat straight away or serve as follows...

To serve 2 people

For the chocolate strawberries

  • 1oz/25g dairy-free chocolate, melted
  • 2 strawberries
Melt the chocolate and dip the strawberries in. Place on grease-proof paper to set.

For the strawberry sauce
  • 2 tsp sugar
  • 2-4 strawberries, diced
  • 2 tsp Cointreau or other fruit liqueur (or orange juice)
Mix the sugar and chopped strawberries together in a heatproof bowl and microwave on high for 30-60 seconds, until the strawberries have softened.
Add the Cointreau and stir well.

Sandwich 2 cookies with a generous scoop of ice-cream. Top with a chocolate-coated strawberry and serve with a spoonful of strawberry sauce.

Alternatives: For a dinner party dessert, cut out circular cookies and serve as above.

Pin It

Monday, 4 February 2013

Chocolate Microwave Mug Cake (Vegan)

It's a hard job, but someone has to do it... perfect an easy recipe for a vegan microwave mug cake that is! Of course, this took many attempts and I inflicted the varying results on my poor children, not that they complained at the prospect of eating yet another chocolate dessert. 

This is a very economical pudding to make and takes literally 5 minutes to prepare and cook, so it's a great one for kids to make. You can mix the ingredients together in the mug, but I find it easier to mix them in a jug and pour into a mug before cooking.

I adapted this recipe from the standard 4 tbsp non-vegan version (available in various forms on the inter-web) which makes a larger cake. Unfortunately, none of my mugs were big enough to hold the cooked mixture and I ended up with a Vesuvius type eruption in my microwave on one occasion! Half of the standard mixture gave a small cake, which only ¾ filled the mug and looked a little feeble.

This version fits an average 250ml/½ pint mug and serves one teenager/adult or can be split between 2 children.  As you can see, the cooked cake sinks a bit after cooking, but this doesn't affect the flavour. 
  • 3 tbsp self raising flour
  • 3 tbsp soft brown sugar
  • 1 tbsp cocoa powder, sieved
  • 1 level tsp Orgran No Egg (or similar egg replacer) - add this dry to the flour  
  • 3 tbsp/45 ml dairy-free milk (water would probably work too)
  • 2 tbsp vegetable/sunflower oil
  • 1 tbsp peanut butter, vegan chocolate/hazelnut spread (or an extra tbsp of oil)
  • 1 tbsp dairy-free chocolate chips
  • ½ tsp vanilla or coffee extract or a good pinch of ground cinnamon.
Mix all of the dried ingredients together in a jug.
Add all of the liquid ingredients and mix well, making sure there are no pockets of dried ingredients.
Pour batter into a standard mug (it should be no more than half full). 
Microwave on high/full power for 2-2½ minutes or until until firm to the touch - I found that 2 minutes gave a moist, brownie texture and 2½ minutes gave a more traditional sponge cake texture...both tasted good! Watch as it cooks, as it will rise a lot, but don't open the microwave until it has finished rising.
Carefully remove the mug from the microwave using oven gloves...the mug will be HOT!!!
Allow to cool in the mug for about 5 minutes before eating.

Top tips: This cake needs to be eaten warm and does not keep. 
You can easily double the ingredients to make two cakes, but only cook one at a time.

Pin It

Wednesday, 5 December 2012

Oaty Florentines

Oaty Florentines, vegan
I had some crunchy oat cereal to use up, so I thought I'd experiment with it, to make a budget version of Florentines. I also made a dairy-free version, as I wouldn't want my vegan friends to miss out on such a tasty Christmas treat! This recipe can also be made nut-free if needed, depending on which cereal you use.

Make these a few days before Christmas to add to your home made hamper, or wrap in cellophane as gifts for friends, family or teachers. 
  • 1 ½ cups of crunchy oat cereal/granola, crushed with a rolling pin if needed 
  • ½ cup chopped dried fruit and/or nuts
  • 4oz/100g soft brown sugar
  • 4oz/100g butter/dairy-free spread
  • 2 tbsp plain flour
  • 8-10 glace cherries, chopped
  • 4 tbsp double cream (substitute for golden syrup/maple syrup for vegan option)
  • 8oz/200g chocolate/dairy-free chocolate
Pre-heat the oven to 180C/170C Fan/ Gas4/350F.

Melt the butter and sugar together in a saucepan on a low heat.
Remove from the heat and stir in the cream or syrup.
Mix in the flour and stir until you have a smooth mixture.
Add all of the remaining ingredients and mix well. Add a little more cereal if the mixture seems too runny.  

Place small spoonfuls of the mixture on greaseproof/parchment paper on a baking tray. Space well apart (5 or 6 per tray) as they WILL SPREAD!
Bake for 7-8 minutes, then remove from the oven.
Using a palette knife, gently neaten up the shape of the Florentines, by pushing the edges in a little, to make them round. 
Return to the oven for a further 1-2 minutes, until golden brown.
Remove from the oven and allow to harden for about 5 minutes, before removing from the tray and cooling completely on a wire rack.

When cold, melt the chocolate in the microwave or in a bowl oven a pan of boiling water.
Spread a teaspoonful of melted chocolate onto the back of each Florentine and allow to set for around 10 minutes. Before it has completely set, make wavy lines in the chocolate using the back of a fork.

Not suitable for freezing. Will keep for up to a week in an airtight container. 

Pin It

Monday, 13 August 2012

Black Forest Muffins (with a vegan option)

Baking Mad asked if I would like to test out another one of their recipes, this time using Silver Spoon Homegrown sugar, which is the ONLY sugar grown in Britain. As I already buy Silver Spoon products, I was happy to oblige.
"Silver Spoon sugars are made from sugar beet . The sugar beet that goes into Silver Spoon sugars travels a short distance to the factory (an average of only 28 miles) direct from the fields around Bury St Edmunds in East Anglia. Silver Spoon work with 1,200 local farmers to grown the beet, which is then made into their range of homegrown sugars for families all over the country."   The first 10,000 people to register with Baking Mad before 30th September 2012 will receive a free Silver Spoon mystery gift (UK only).  
I decided to go for the rather indulgent looking Black Forest Muffins, as cherries are cheap and plentiful in the UK at the moment. These are quite time consuming to make (compared to simple muffins), with the cherry pitting and soaking, but worth the effort for a special dessert. I cooked two batches - one non-vegan and one vegan - as I didn't want my lovely vegan readers to miss out on these (the vegan variations are in italics). Of course, that meant a lot of muffins to eat, but my family bravely stepped up to the mark and helped out!

For the muffins:
  • 450 g fresh cherries pitted and halved
  • 2-4 tbsp kirsch, white rum or cherry brandy
  • 150 ml water
  • 110 g dark chocolate chips (Silver Spoon Create) - v.o dairy free chocolate
  • 225 g unsalted butter, softened v.o dairy free spread
  • 175 g caster sugar (Silver Spoon Homegrown)
  • 3 free range eggs - v.o option Orgran No Egg or similar egg replacer
  • 400 g plain flour 
  • 50 g cocoa powder
  • 1½ tsp baking powder
  • 1½ tsp bicarbonate of soda
  • 140 ml sour cream - v.o dairy free vanilla or plain yogurt
For the topping:
  • 400 ml double cream
  • 3 tbsp caster sugar (Silver Spoon Homegrown)
  • 1 tsp vanilla extract
Vegan topping:
  • 200g icing sugar (Silver Spoon Homegrown)
  • 1 tsp vanilla extract
  • Boiled water to mix
Plus:
  • 12 cherries to decorate
  • Chocolate shavings or chocolate chips, to decorate - v.o dairy free chocolate
Method
Combine cherry halves with the kirsch, cover and set aside over night or for at least 2 hours. 

Heat the oven to 180°C/170 °C Fan Oven/350°F/gas 4.

Place paper cases in a 16 hole muffin tin.

In a small pan, over a low heat combine the water and chocolate chips. Heat, stirring frequently until the chocolate has melted. Remove from the heat and allow to cool.


(For the vegan option, at this stage cream the 
sugar and dairy free spread, then add the remaining muffin ingredients including egg-replacer and mix until just combined. Then continue as for regular muffins.)

In a mixing bowl, using an electric mixer set on medium speed, cream the butter and sugar together until light and fluffy. Add the eggs, one at a time, followed by the cooled chocolate, scraping the sides of the pan and mix thoroughly.


Mix together the flour, baking powder and bicarbonate of soda. Add the flour mixture to the chocolate mixture in batches, alternating with the soured cream, mixing on low speed to incorporate.


Spoon half of the mixture into the paper cases, add a spoonful of cherries - about 6 halves - (reserving the liquid) and top with the remaining cake mixture, so that the paper cases are filled to the top. 


Bake for 25-30 minutes, until firm to the touch. Cool in the tin for 10 minutes; turn out and cool completely on a wire rack.


Using a skewer or cocktail stick, poke several holes in the top of the muffins. Drizzle or brush the reserved cherry liquid over the top of the muffins and allow to soak in.


Toppings

For the whipped cream: whisk the cream until soft peaks form. Add the sugar and vanilla and whisk until incorporated. Place a spoonful of whipped cream on top of each cupcake. 
For the vegan topping: Mix the icing sugar with the vanilla and just enough water to make a thick, but spreadable icing.
Decorate with fresh cherries and shaved chocolate. Refrigerate until ready to serve.


The Verdict
Not bad at all! The vegan muffins were a pretty good match for the non-vegan ones both in appearance and taste. In my photos above, you can see the slightly more bumpy-looking vegan muffins in the plain cake cakes and the non-vegan ones in the patterned cases.I found that both batches were a little drier than expected though, so I've reduced the amount of flour in the recipe above (compared to the original recipe from Baking Mad). I also felt that the original mixture didn't look dark/chocolaty enough, so I also added some cocoa powder. When I bake these again, I'll  mix the cherries and kirsch into the batter so they're distributed through the cakes rather than in one layer in the middle, as I think this will improve the taste and moistness of the cakes.

Integrity Statement
This is a sponsored post. I received free cooking ingredients (sugar, flour, chocolate chips and vanilla extract) in return for mentioning Silver Spoon Homegrown Sugar and Baking Mad. Original recipe courtesy of Baking Mad.

Pin It

Wednesday, 7 March 2012

Eric Lanlard's Peanut Butter Blondies

The new series of Baking Mad with Eric Lanlard started on 5th March at 12:05pm on Channel 4 and will be on every week day for 4 weeks. If you haven't seen the programme before, Eric bakes sweet treats ranging from simple, but delicious home baking recipes to his beautifully crafted signature desserts. 

Each episode will also feature three members of the public who will come to his cookery school and take part in a bake off. Various bloggers have also been invited to take up the challenge to bake one of Eric's culinary creations in their own home and enter into a virtual bake off

I chose to bake Peanut Butter Blondies as we all love brownies, but had never tried blondies before. 10 year old Miss Kahonie helped me bake and decorate them, and I think she did a pretty good job; She also did a good job of licking the bowls clean! 

The recipe was spot on (including the cooking time), and I'm very happy with the resulting blondies, which are suitably peanut-buttery, moist and chewy - what's left of them anyway!

P
eanut Butter Blondies

Makes 12

 Peanut Butter Blondies
  • 100g unsalted butter, softened, plus extra for greasing the tray
  • 150g crunchy peanut butter
  • 1 tsp. vanilla extract
  • 175g golden caster sugar
  • 1 egg
  • 75g white chocolate, plus extra to decorate
  • 75g walnut halves, chopped plus extra to decorate
  • 125g plain flour
  • 1 tsp. baking powder
  • Dark chocolate melted, to decorate.
  • White chocolate chips, to decorate
Preheat the oven to 170°C/150°C fan/325°F/Gas Mark 3. Grease a 20cm/ 8-inch square tin with butter and line the base with baking paper.

In a large bowl, beat the butter and peanut butter together until creamy, using an electric hand whisk at medium speed. Add the vanilla, sugar and the egg, and beat again until light and fluffy.
Chop up the white chocolate and stir into the mixture along with the chopped walnuts.
Sift the flour and baking powder into the mixture and fold in, using a large metal spoon.
Spoon the mixture into the prepared tin and smooth the top. Bake the mixture in the middle of the preheated oven for 35-40 minutes until it has a nice golden crust but is still fudgy in the middle.

Leave to cool in the tin. Decorate with white chocolate chunks and walnut pieces and drizzle over some melted dark chocolate. Cut into squares and serve.  

"Baking Mad with Eric Lanlard is a beautifully produced series that balances inspiration with information, engaging the viewer to try new things to add to their baking repertoire. Baking Mad with Eric Lanlard is sponsored by Bakingmad.com, an inspirational online community of over 100,000 members sharing a wealth of information, recipes, hints, tips and advice."
Integrity Statement
This is a sponsored post, for which I have received free cooking ingredients and 2 free cook books. The views expressed are genuinely those of myself and my family.
Recipe reproduced by kind permission of Baking Mad.

Pin It

Saturday, 21 January 2012

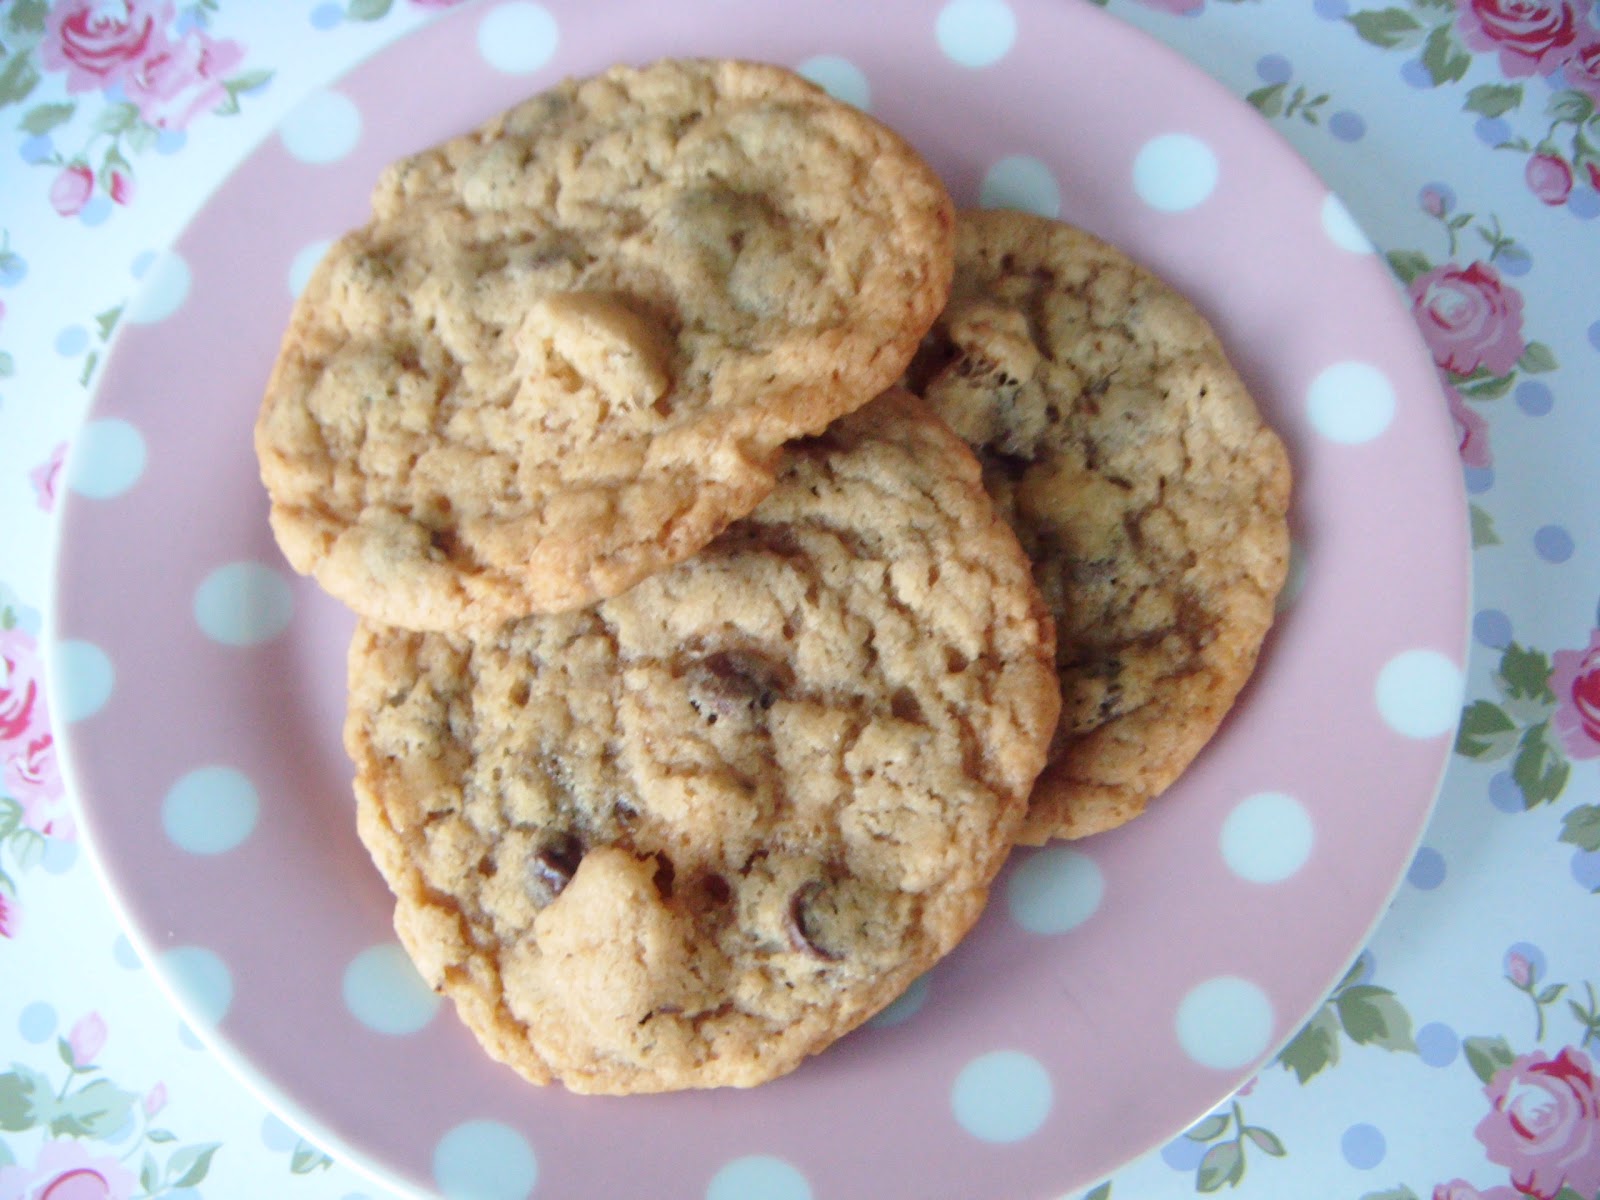
Chewy Chocolate Chip & Walnut Cookies (Vegan)

©
These chocolate chip cookies are made using an old family recipe which I've veganised by swapping the egg for a tablespoon of syrup. This affects the texture, but in a good way - as it changes them from firm and biscuity to soft and chewy! They're really quick and easy to make and taste pretty much like the ones you buy in the shops.

Makes 20

  • 200g/8oz SR flour
  • 150g/6oz soft brown sugar
  • 125g/5oz dairy-free spread
  • 50g/2oz dairy-free chocolate chips
  • 50g/2oz chopped walnuts or pecans
  • 1 tbsp golden syrup
  • 1 tsp vanilla extract
Heat oven to 190C/180C Fan/Gas 5.
Rub the spread into the flour (or blend in the food processor).
Mix in the sugar, syrup and vanilla.
Stir in the chocolate chips and walnuts.
Divide the dough into about 20 pieces and roll into balls, using your hands.
Place well spaced apart (they will spread!) on greased baking trays, and flatten slightly.
Bake for 10-12 minutes, until golden.
Cool for a few minutes on the tray so that they firm up a little and then remove and place on a wire rack to cool completely.

Suitable for freezing.

Alternatives: Swap the chocolate chips and walnuts for chopped dried fruit, glacé cherries, stem ginger etc.
Pin It

Thursday, 1 December 2011

Oreo Truffles

©
As it's the 1st of December, I thought I'd start adding some more Christmas-inspired recipes to my blog (here are some of last years' recipes).

This recipe was given to me by a work colleague who generously brought some of these delicious morsels into work to help raise money for Children in Need. I'd never tried them before, but after googling, it seems that Oreo truffles are very popular, especially in the US. They're easy enough for children (or inexperienced cooks) to make, but taste quite wonderful!

These truffles would make a great dessert canape for parties (double the recipe) and I think they'd be a great Christmas gift, the only problem being is that they need to be kept refrigerated due to the mascarpone cheese in them.

Makes about 20
  • 1½ packets (200g/8oz) Oreos (or other biscuits*)
  • 100g/4oz mascarpone or other mild-tasting cream cheese
  • 150g/6oz plain, milk or white chocolate
Put the biscuits in the food processor and blend into crumbs (or put in a plastic bag and crush with a rolling pin).
Add the cream cheese and blend again to make a firm mixture (add a little more cheese if needed).
Refrigerate for 30-60 minutes, to allow the mixture to firm up.
Roll into small balls using your hands and then chill in the freezer for 10-15 minutes.
Melt the chocolate and dip each Oreo ball into the chocolate to cover.
Remove with a fork and drain off the excess chocolate.
Place on greaseproof paper, decorate with sprinkles if wanted and chill until set.

Will keep in the fridge for up to a week.

Alternatives: Add a few drops of flavouring essence to the biscuit mixture such as vanilla, mint, orange, coffee etc.

Oreos may not strictly vegetarian as they may contain non-vegetarian whey...try using other biscuits to make different flavoured truffles (e.g. amaretti, chocolate-chip cookies, shortbread etc) - adjust the amount of mascarpone used to make a firm mixture.

Pin It

Wednesday, 9 November 2011

Mocha Cream Biscuits

©
I fancied baking some biscuits yesterday and couldn't decide what to make. I came up with this recipe after browsing several recipe books and not finding anything I wanted to cook! They're based on a gypsy cream recipe I found in Cookies Galore .
  • 100g/4oz dairy-free spread/butter
  • 50g/2oz soft brown sugar
  • 75g/3oz plain flour
  • 50g/2oz rolled oats
  • 25g/1oz cocoa powder, sieved
Cream the butter and sugar together.
Mix in the dried ingredients to form a firm dough.
Roll the dough into 16-20 small balls, using your hands (make sure there's an even number!)
Place on a greased baking tray and flatten slightly.
Bake for 12-15 mins at 170C/160C Fan/Gas 3
Cool for 5-10 minutes before removing from the tray and cooling on a wire rack.

Mocha Icing/Frosting
  • 50g/2oz dairy-free spread/butter
  • 100g/4oz icing sugar
  • 1 tbsp cocoa powder, sieved
  • 1 tsp instant coffee granules dissolved in 1 tbsp boiling water
Cream the butter and cocoa. 
Mix in the icing sugar, adding enough coffee to make a smooth, spreadable icing.
Pipe or spread the icing onto half of the biscuits and sandwich together.

Suitable for freezing.

Alternatives: Substitute the coffee for orange or mint extract, and up to 1tbsp boiled water.

Make mini biscuits (divide mixture into 32-40 balls), sandwich together as before and then dip each biscuit into melted chocolate. Leave to set on greaseproof paper. Package up in cellophane and give as presents, or add to a homemade hamper.

Pin It

Thursday, 22 September 2011

Chocolate Tiffin (Vegan)

slices of chocolate covered vegan tiffin
My kids love chocolate tiffin (biscuit cake/refrigerator cake) and are old enough to make this on their own now. I decided to earn some good mum points today though and made some on my afternoon off work, so they would be ready to eat as an after dinner treat. 
  • 200g/8oz crushed vegan digestive biscuits (Graham crackers)
  • 100g/4oz dairy-free spread (not reduced/low fat)
  • 2 tbsp soft brown sugar
  • 4 tbsp unsweetened cocoa powder
  • 4 tbsp golden syrup
  • 1 tsp vanilla extract (or your choice of coffee, peppermint, orange extract etc)
  • 100g/4oz chopped dried fruit (I used raisins, glace cherries and apricots)
  • 100g/4oz dairy-free chocolate, melted.
Crush the biscuits in a plastic bag, using a rolling pin, or use a food processor.
Put the spread, sugar, cocoa, and syrup in a bowl and melt on a low setting in the microwave. Stir well.
Add the flavouring, dried fruits and crushed biscuits.
Mix until all the biscuit crumbs are coated.
Pour into a greased square baking tin and press down well with the back of a spoon.

Melt the chocolate on a low setting in the microwave.
Pour over the biscuit base and spread, with the back of a spoon, to cover.
Chill in the fridge.
Cut into squares when cold.

Keeps for up to a week in an airtight container.

Not suitable for freezing.

Alternatives: you can really use any plain biscuits in this recipe such as rich tea, shortbread, Nice etc. or use a combination if you wish. 
Swap the dried fruits for chopped nuts or seeds, if preferred.
Gluten-free option: swap the biscuits for a gluten-free variety.

Top Tip: This is a good recipe to use up left over Christmas or Easter chocolate.

Pin It

Friday, 10 June 2011

Chocolate Orange Cupcakes (Vegan)

vegan chocolate orange cupcakes

I've been attempting to make a decent vegan chocolate cupcake for some time now. I wanted to make them without egg replacer or any fancy ingredients, but although I found I could make great tasting cakes, the texture was too crumbly without egg to stick it together. This time I added a grated apple and that seemed to do the trick!
  • 250g/10oz SR flour
  • 200g/8oz soft dark brown sugar
  • 4 tbsp fine shred orange marmalade
  • 150g/6oz vegan/dairy-free spread
  • 150ml/a generous ½ cup cold water or dairy-free milk
  • 50g/2oz unsweetened cocoa powder
  • ½ tsp bicarbonate of soda
  • 1 peeled and grated eating apple
  • 50g/2oz dairy-free chocolate chips, raisins, chopped dates or chopped nuts (optional)
Pre-heat oven to 180C/170C Fan/Gas 5/375F. 

Cream the dairy-free spread and the sugar, then add the cocoa, grated apple and marmalade and mix well.
Add the flour, water/milk and bicarb. Blend until you have a smooth mixture.
Stir in some chocolate chips/chopped nuts etc (optional).
Spoon generously into 12 muffin/cupcake cases.
Bake for 25-30 minutes, or until firm to the touch.
Ice when cool (optional).

Suitable for freezing.

Orange glacé icing
  • Juice and zest of 1 orange
  • 100g/4oz icing sugar
  • A couple of drops of orange food colouring (optional)
Mix all ingredients together. Add a little boiling water or some more icing sugar if needed, to make a thick, but spreadable icing.
Spread on top of each cake.

Pin It

LinkWithin

Related Posts Plugin for WordPress, Blogger...