Wednesday, 31 October 2012

Perfect Honeycomb/Cinder Toffee

perfect cinder toffee
©
Miss K and I decided that we wanted to have a go at making some honeycomb (also known as cinder toffee, Crunchie and hokey pokey depending on where you live). I've tried making this a couple of times before with varying degrees of success, so I scoured the internet looking for the 'perfect' recipe. I found that some recipes used vinegar and bicarbonate of soda, while some just used the bicarb; some recipes included butter and some didn't and some required a sugar thermometer while others didn't! So in the end, I settled on one of the most simple recipes I could find, after googling 'perfect cinder toffee', which was on  a blog called Cream Until Fluffy...which sadly no longer exists.


perfect honeycomb
©
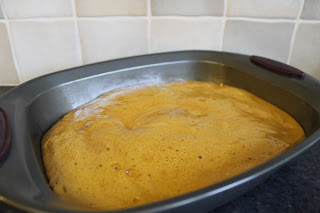
After reading the comments, I decided to use a sugar thermometer (I boiled the sugar and syrup to between 140C and 150C or  between the 'soft/'hard crack' stages - the colour is a good indication if you dont have a sugar themometer) and I reduced the amount of bicarb by half (2 level tsp). Apart from that, I followed the recipe and method exactly. 

The only problem I encountered was getting the stuff out of the tin after it had cooled. I thought I had greased my (non-stick) tin really well, but obviously not well enough. It took me some time and determination to chisel the honeycomb out, but most of it did come out of the tin eventually! I would recommend greasing the tin, really, really well...or maybe line the tin with greased parchment paper.


As you can see from the photos, the honeycomb looks good and I can tell you that it tastes even better!

  • 200g caster sugar
  • 2 tbsp. water
  • 4 tbsp golden syrup
  • 2 tsp bicarbonate of soda (baking soda)
8″ square tin, well buttered.
 .
Combine the sugar, water and syrup in a saucepan. Put the saucepan on a low-medium heat and allow it to dissolve, stirring occasionally.
Turn the heat up slightly. Do not stir at all.
Allow it to simmer for 3-4 mins until it darkens a little – no darker than maple syrup though.

Take the pan off the heat and quickly beat in bicarb. for a few seconds. Pour it into the well greased tin and leave to cool and set. Something in the region of 3 hours. Chop, splinter and cut with a knife. Store in an airtight tin.

Recipe and method reproduced by kind permission by Anna of Cream Until Fluffy.
Pin It

Thursday, 25 October 2012

Roasted Vegetable and Lentil Burgers

vegetarian burger in a bun
©
These veggie burgers take a little while to make, but I think they're worth the effort as they have a good flavour and texture and are packed full of vegetables. I used my trusty old Lakeland burger press to make them. If you make burgers regularly, it's worth getting one, as they squeeze all the air out of the mixture, leaving you with a good, solid burger which can stand up to being turned in the pan.

Makes 6-8 burgers

  • 1 cup of cooked & drained puy/green lentils
  • 1 small onion, diced 
  • 4-6 chestnut mushrooms, chopped roughly
  • 2 small/1 large red or yellow bell pepper, diced
  • 150g/6oz sweet potato peeled and cubed
  • 1 large clove of garlic
  • 2 slices of bread, made into breadcrumbs
  • 100g grated halloumi or paneer cheese (or vegan cheddar-style cheese)
  • 1 small egg/1 tsp Orgran no egg mixed with 1 tbsp cold water (or similar egg replacer)
  • 1 tsp paprika
  • ½ tsp English mustard powder
  • 1 tsp dried oregano or mixed herbs
  • Black pepper to taste
Pre-heat the oven to 180C/170C Fan/Gas 4/350F
Put all of the vegetables and the whole, unpeeled clove of garlic in an oven proof dish. 
Drizzle with 2 tbsp olive oil and roast for around 20-25 minutes until softened and starting to colour.
Allow to cool for about 5 minutes, then remove the clove of garlic and squeeze the cooked garlic out from the peel, onto the vegetables.

©
Transfer the roasted vegetables, lentils, grated cheese, seasonings and egg/egg replacer into the food processor.  
Blend/pulse for a few seconds, to break up and mix the lentils and vegetables, but not do not purée them. 
Add enough breadcrumbs to make a firm dough-like mixture. 

Allow the mixture to to stand for about 30 minutes.
Divide into 6-8 portions and using your hands or a burger press, shape into burgers.

Fry the burgers in a drop more olive oil for about 5 minutes on each side until golden brown.
Serve in bread rolls with your favourite burger toppings.

Alternatives: For a spicy bean and veggie burger, swap the paprika and mustard powder for 2 tsp mild (or hot!) chilli powder and swap the lentils for a cup of drained, tinned kidney beans. 

Suitable for freezing (before coking). Layer between sheets of grease-proof paper and wrap in cling-film.
Pin It

Monday, 15 October 2012

The Spice Tailor curry sauces from Anjum Anand - a review


I'm ashamed to say that National Curry Week passed me by last week, without me hearing anything about it, so this week I'm making up for it by cooking three different vegetarian curries using three of the new curry sauces from The Spice Tailor. I regularly cook curries from scratch, so I was surprised to read that a recent survey by The Spice Tailor, found that despite tikka masala being Britain's favourite curry, only 25% of us have ever tried cooking it at home.

Celebrity chef Anjum Anand has develop her own range of sauces which makes cooking a curry at home, faster than ordering one from the take-away! There are seven sauces in the range, most of which come with a sachet of dried spices, a base sauce and a curry sauce. Recipe tips and suggestions for extra ingredients are included, but basically you fry the dried spices (with or without the optional dried chilli) in a drop of vegetable oil, then add your choice of paneer, pulses and/or vegetables (or meat/fish, if you're not vegetarian!), followed by the base sauce. After a couple of minutes, you add the curry sauce and leave to simmer for about 8 minutes.


©
I tried out three of the sauces: the Tikka Masala (which I added paneer and mushrooms to), the Punjabi Tomato (with added chickpeas and aubergine) and finally the Spiced Spinach (with added potatoes and green pepper). I pre-cooked all of the vegetables, except the mushrooms, before adding them to the curry sauces, as I knew that they wouldn't cook through in 8 minutes, however paneer, tinned pulses and meat substitutes such as Quorn would all work well and cook in the stated time if you were in a hurry. I added the whole chilli to all of my curries and fished it out before serving...we're all used to eating medium curries and I would say, even with the added chilli, all of the curries were on the milder side of medium. Some of the other whole spices needed removing before serving too, such as the whole cardamom pods and the curry leaf. You could, of course, leave them in and play 'find the spices' at the dinner table with the family!

Each of the curries looked and tasted very different from each other and the smell in my house was amazing! We all like the flavour of the Punjabi Tomato curry best, followed by the Tikka Masala. A word of warning though...the Tikka Masala didn't taste anything like a British restaurant tikka massala; it tasted strongly of cardamom and wasn't sweet and creamy. Not a criticism, as it tasted very aromatic, just not how I expected it to taste! The Spiced Spinach curry was our least favourite as it tasted a little bitter and the spinach flavour dominated the dish. I would have preferred to add fresh spinach instead. I found the sauces very simple to use, and good value for money. Although each sauce was supposed to serve two, I found that by adding extra vegetables and pulses, each one made a curry big enough to feed my family of four.
If you want more tips on cooking curries at home, tune in to Cookalong with Anjum on ‘Spice Nights’, when Anjum will be showing how to cook simple and delicious Indian dishes in just 15 minutes, using some cheats and lots of scratch cooking.  Spice Nights airs weekly on Tuesday evenings at 7.30 pm from now until 6th November. Register to watch at www.thespicetailor.com.

The Spice Tailor range is now available to buy online at www.thespicetailor.com and in Waitrose stores.

Integrity Statement
I received 3 Spice Tailor curry sauces to review and 3 to give away on my blog. I did not receive payment, and the views expressed are genuinely those of myself and my family. Pack images courtesy of The Spice Tailor.

Pin It

My second blogoversary

Well, it's that time of year again. My blog is almost 2 years old, and to celebrate, I'll be hosting not one but two fab foodie give-aways this week. It'll be my first attempt at using Rafflecopter, so do bear with me and let me know if you find it doesn't work!

This year, other than my usual recipe and review posts, I linked up with a charity called Deki, and loaned some money to a woman called Leontine from Togo, who wanted a loan to expand her food stall business. Her loan was fully funded and the great news is that she has already paid back £130 of the £390 she borrowed. 

One last thing I must just mention...This year, I was very excited to find my blog mentioned on Red Online as one of their best vegetarian food blogs (alongside Ellen!). Not bad for some one who wondered if anyone would read her blog when she first started blogging.

Thanks for all the likes, follows, tweets, comments and competition entries over the past year...I really do appreciate them. Keep a look out for my next give-away and remember that you've got to be in it to win it Pin It

Thursday, 11 October 2012

Stuffed Butternut Squash

stuffed butternut squash on a plate with garlic bread
I love butternut squash, and as it's in season and cheap at the moment, I thought I'd experiment with a new recipe. This stuffed squash makes an impressive main course suitable for a dinner party and would also be lovely as an alternative to nut roast at Christmas or Thanksgiving.

Serves 2
  • 1 small butternut squash, halved lengthwise
  • 1 small red onion, diced finely
  • 50g/2oz sun-dried tomatoes, diced
  • 100g/4oz chestnut (or mixed) mushrooms, diced finely
  • 50g/2oz feta or hard goat's cheese, crumbled or cubed
  • ½ tsp ground fennel seeds
  • black pepper, to taste
  • 2 tsp chopped fresh parsley
Preheat the oven to 180C/170C Fan/Gas 4/350F

Cut the squash in half and scoop the seeds out using a spoon. If the cavity isn't very big, scoop out a little of the flesh too.
Drizzle the squash with a little olive oil and season with half of the ground fennel and some black pepper.
Place on a baking tray and roast for 20 minutes. Turn over and cook for a further 15-20 minutes, or until the flesh is soft and the skin is starting to brown.

Meanwhile heat 1 tbsp olive oil in a pan.
Add all of the remaining ingredients, except the cheese, and cook gently for about 10 minutes.
Remove from the heat and allow to cool slightly while the squash is cooking.

Remove the squash from the oven.
Stir the cheese into the stuffing mixture.
Fill the cavity of each squash with the stuffing, packing well and pressing down with a spoon.
Return to the oven for a further 10-15 minutes.

Serve with a tomato sauce, seasonal vegetables and your choice of roasted potatoes, pasta or garlic bread.

Alternative: For a vegan version either omit the cheese, or swap it for some chopped green olives, or vegetable antipasti.
If cooking as a vegetarian option for Christmas dinner, roast the squash (for 30 minutes) and prepare the stuffing the day before, but don't fill the squash. On Christmas day, fill the squash with the stuffing and re-heat. 

Pin It

Friday, 5 October 2012

Green Vegetable Burritos

©
I'm not sure if these are strictly burritos or not, but whatever they're called, they make a nice quick and healthy snack or lunch. You can of course, vary the vegetables depending on what you have available.

Makes 4

  • 2 medium courgettes/zucchini, quartered lengthwise and sliced
  • 1 large green pepper, deseeded and sliced
  • 75g/3oz spinach, washed
  • 1 clove of garlic, crushed
  • 1-2 tsp mild chilli powder
  • ½ tsp dried oregano
  • 1 tbsp pickled jalapeños chopped
  • 1 cup of grated hard cheese/vegan cheese
  • 1 tbsp chopped fresh coriander/cilantro (optional)
  • 4 corn tortilla wraps
Heat 1 tbsp olive oil in a pan. 
Fry the courgette and pepper until softened and just starting to brown.
Add the garlic, herbs, jalapeños and chilli powder and stir well.
Throw in the spinach and coriander and allow to wilt for a minute or two.

Heat the tortillas until warm (in a pan, microwave or oven). 
Fill with the vegetable mixture and a sprinkle of cheese, fold and eat!

If you have more time, you could make your own 
flatbread wraps.

Jacqueline at Tinned Tomatoes is hosting a sandwich themed No Croutons Required this month, which is handy, as I wrote this post just before I found out the theme!

Pin It

LinkWithin

Related Posts Plugin for WordPress, Blogger...